Robot Foosball Part 1: Intro and Vision
Introduction
Months ago, while burning the midnight oil at work for a late-night release, my team and I would take short foosball breaks when we had to wait for our servers to warm their caches. After one such escapade, my boss mentioned how cool it would be to build a foosball playing robot for the company’s next hackathon. The fatigue from the day instantly faded. My persistent desire to build and create had been unsatisfied for far too long. I produced MacroTracker earlier in the year, but this time I wanted to build something tangible and I wanted it to have AI. Autonomous foosball was the perfect answer!
I broke the project down into 3 milestones. First was the vision aspect, convert the images captured by the camera to some grid-based gamestate object and display it next to the raw camera feed. Second, I needed to complete the hardware and mechanics to control the players. Finally, I needed to write the AI to control the players, specifically I wanted it to learn how to play on its own with Q-learning or perhaps some sort of policy-search. All the code is available on my github.
Parts
I bought a $20 table-top foosball table from Amazon to start. Then, I needed a camera capable of tracking a ball at high speeds. I knew from experience that webcams were poor choices as they tend to be anywhere from 15-30fps, usually on the lower side. I arbitrarily decided I wanted a camera capable of 100fps and began my search. Unfortunately, I quickly discovered that high speed cameras are prohibitively expensive ($500+) and a lot of them use firewire, cameralink, and ethernet ports for data transfer. I wanted to limit myself to USB and eventually found myself with several options:
1. Point Grey Flea3         960p @ 150fps    $700+
2. GoPro Black Edition      960p @ 100fps    $400
3. Highend Android Phone    320p @ 120fps    $200-800
4. PS3 Eye Camera           320p @ 120fps    $20
The Point Grey camera was too expensive for this project (but awesome). I considered the GoPro for a few minutes as it would have been useful for other purposes, but it turns out the only [reasonable] way to stream video is over WiFi which results in a delay that makes it unsuitable for vision applications. Since it was so cheap, I ended up purchasing the PS3 Eye camera to begin coding. I hit a road bump when I discovered the camera was only supported by Sony on Windows and since I had OS X, there was a problem. Macam, an OS X driver for usb webcams, supported my camera, but was unreliable and often crashed. After digging through blogs and forum posts, I learned that some people had managed to attain 60fps in Ubunutu with special drivers. I decided to dual boot my macbook air with Ubunutu and dove into coding. Since, I was disappointed with the framerate I was working with, I continued to dig into other cameras on the side. The HTC One and Galaxy S4 were both capable of capturing high speed video. Since I was in the market for a new phone anyway, I considered this option. Unfortunately, after some testing, I discovered the Camera API for Android was generally capped at 15-30fps (depending on the device) when supplying live camera data. I settled with what I had and trudged on!
Setup
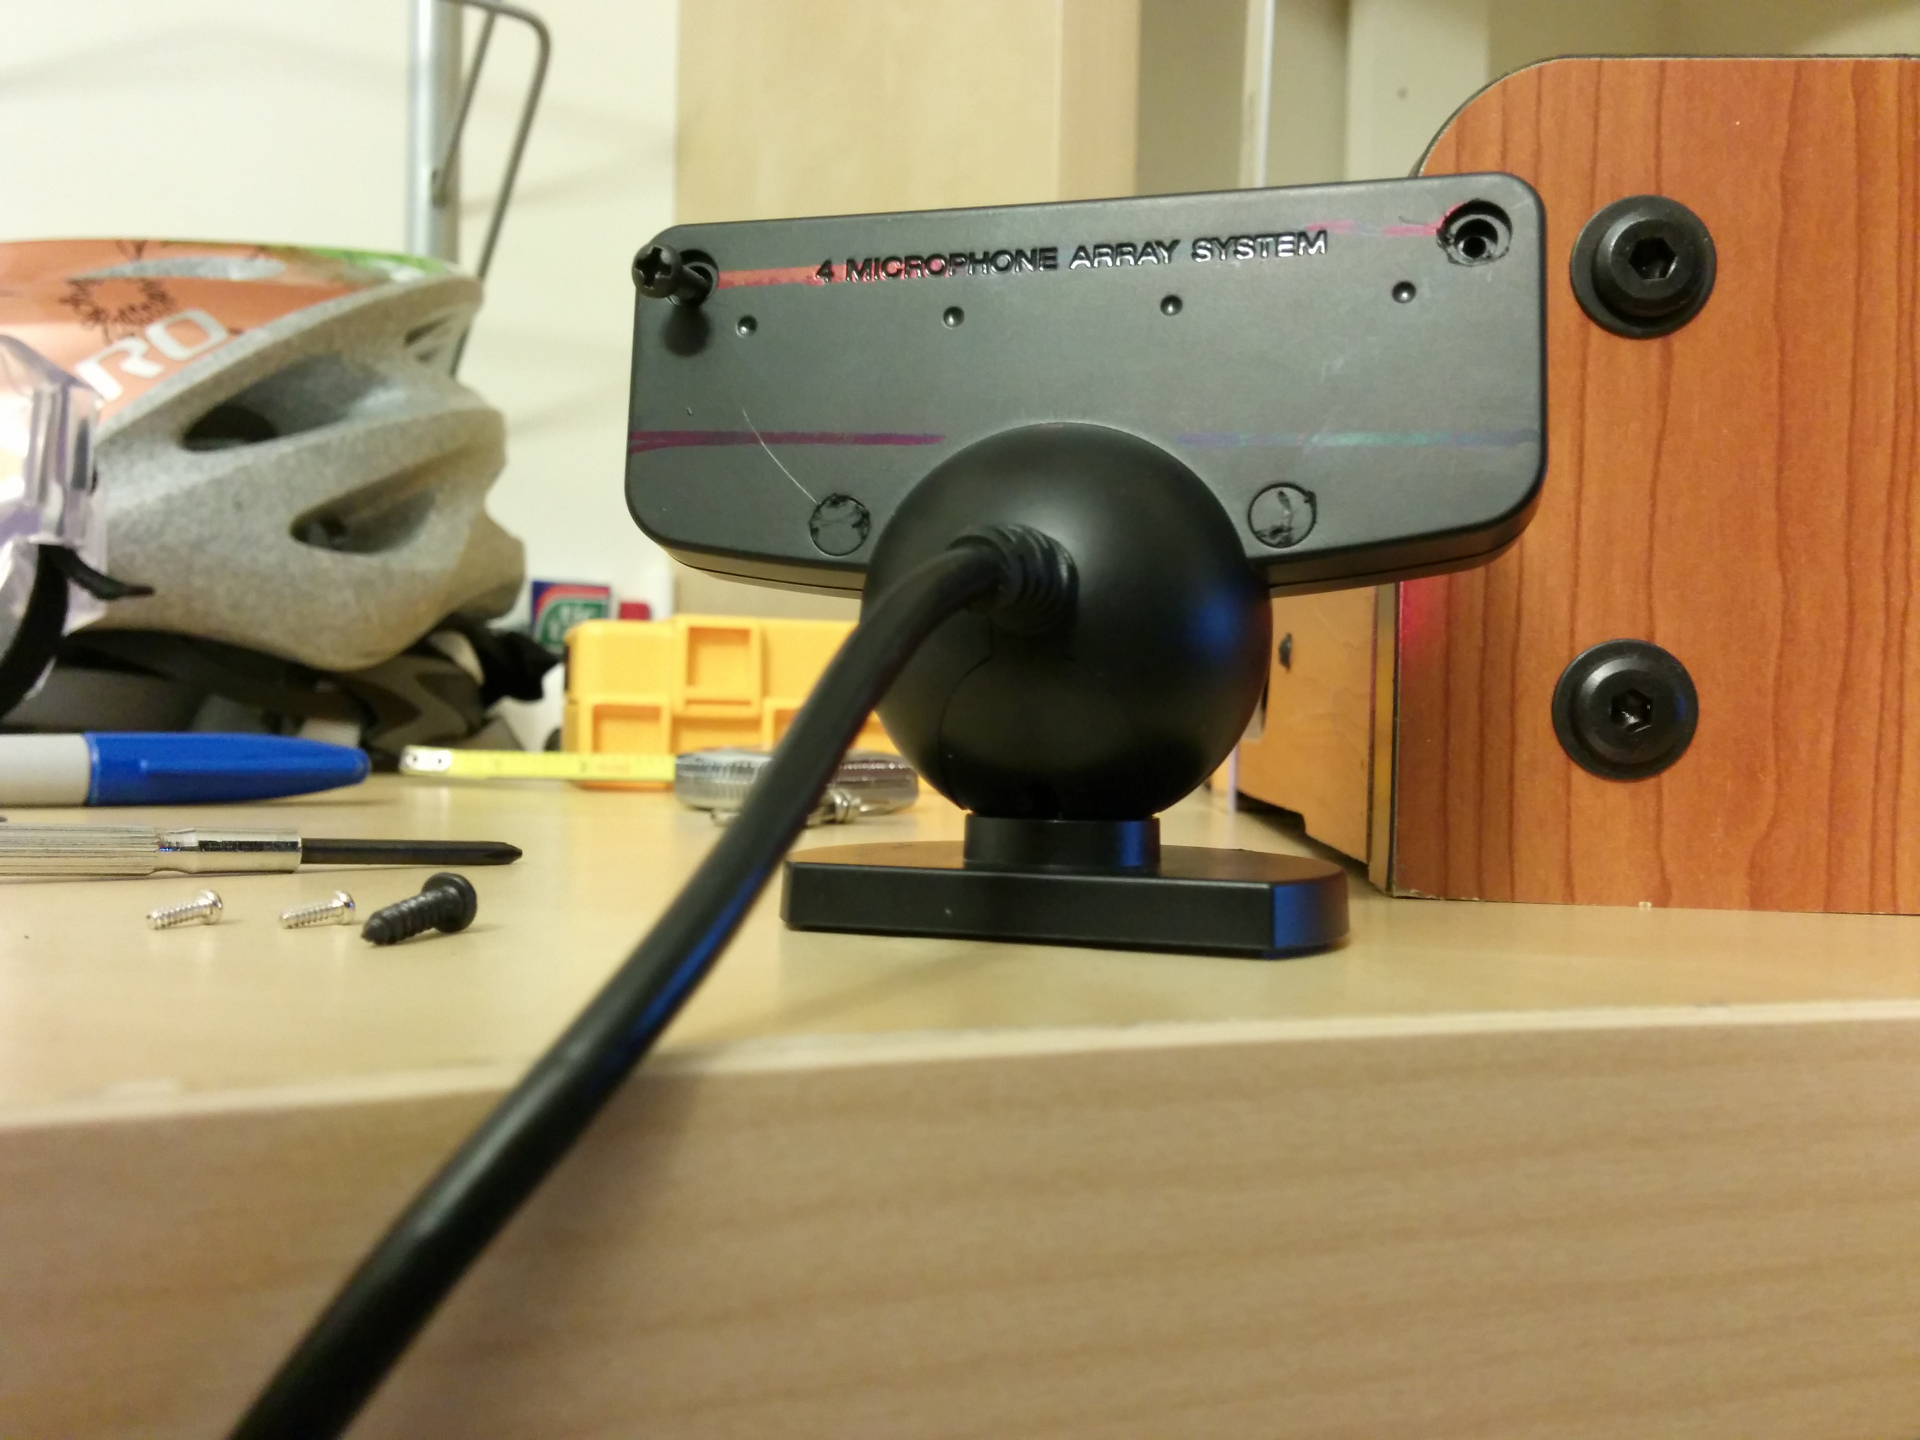
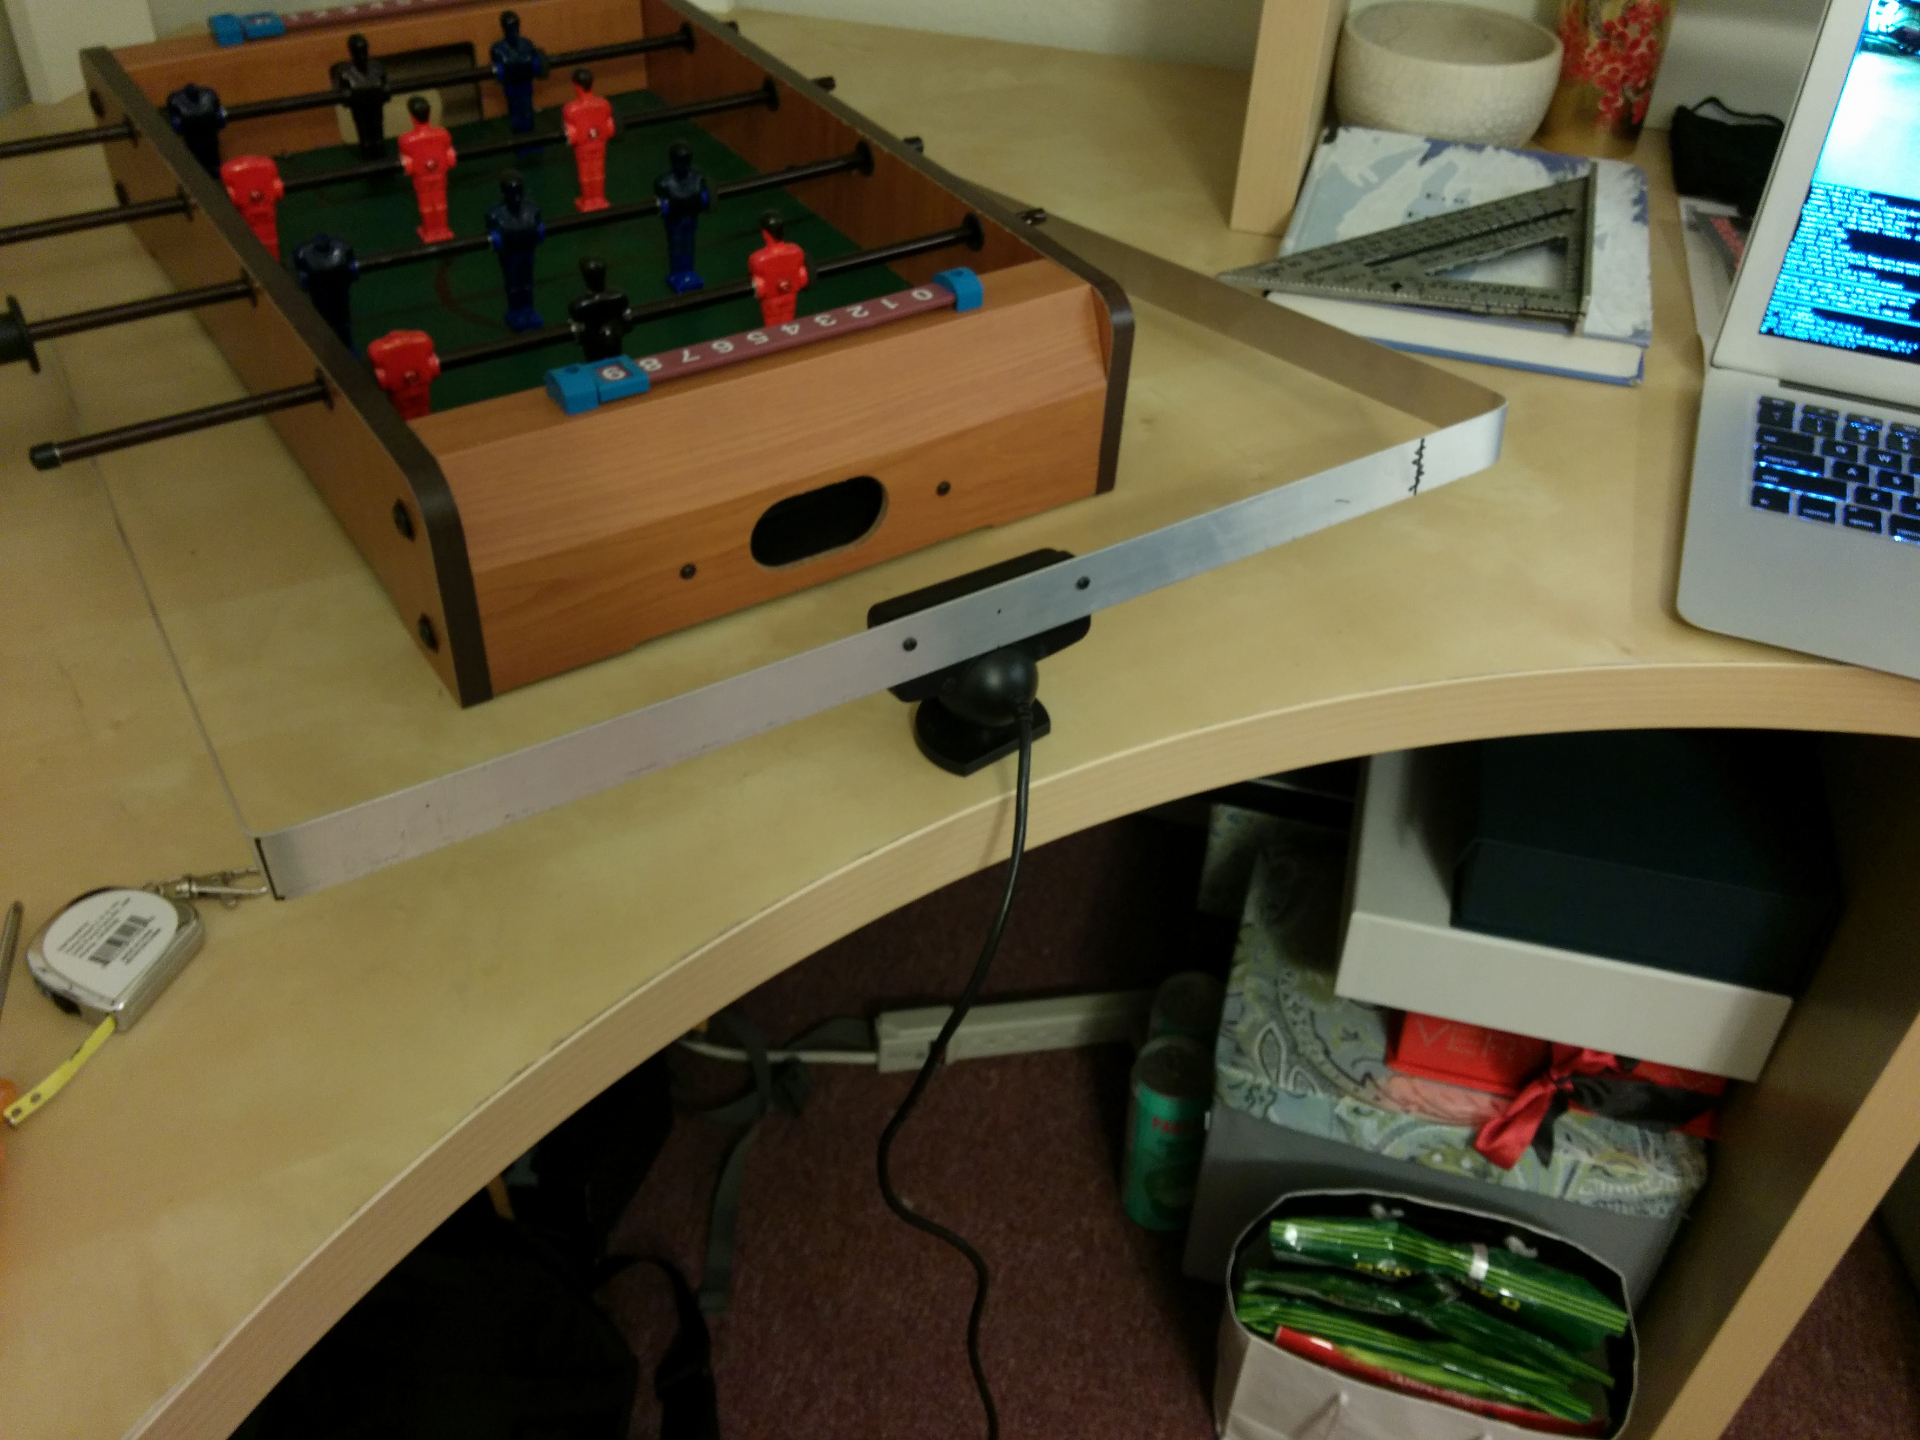
After purchasing some aluminum from my local hardware store, I bent it to the appropriate shape and marked the holes for the camera. To avoid making extra holes in the camera casing, I decided to reuse two of the holes already used to hold it together. Once the camera was secured to the aluminum, I marked the holes on the foosball table itself and attached the whole thing.
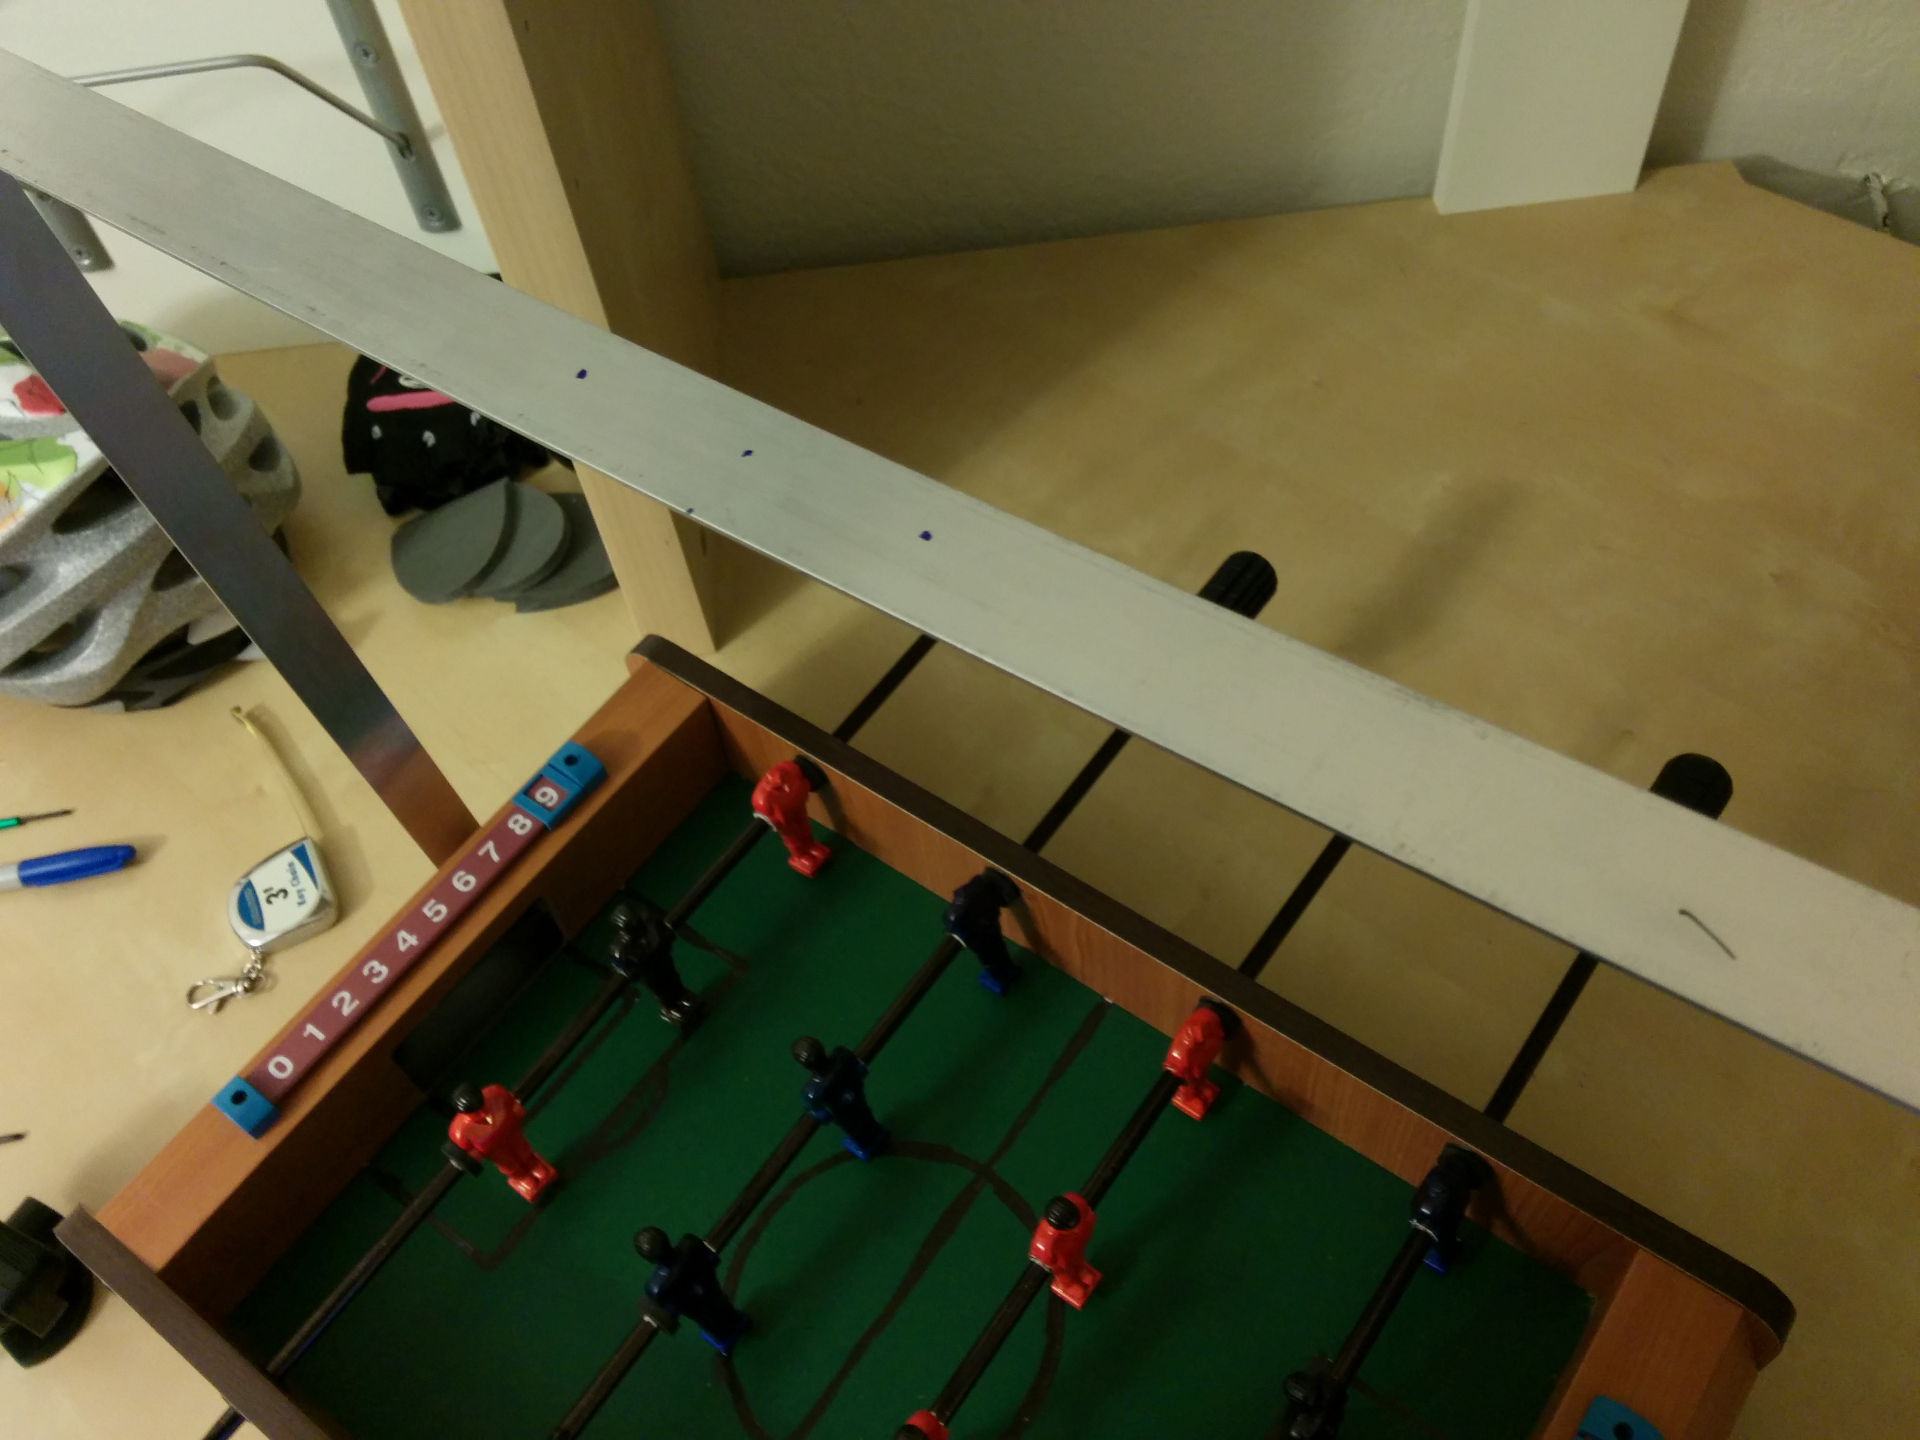
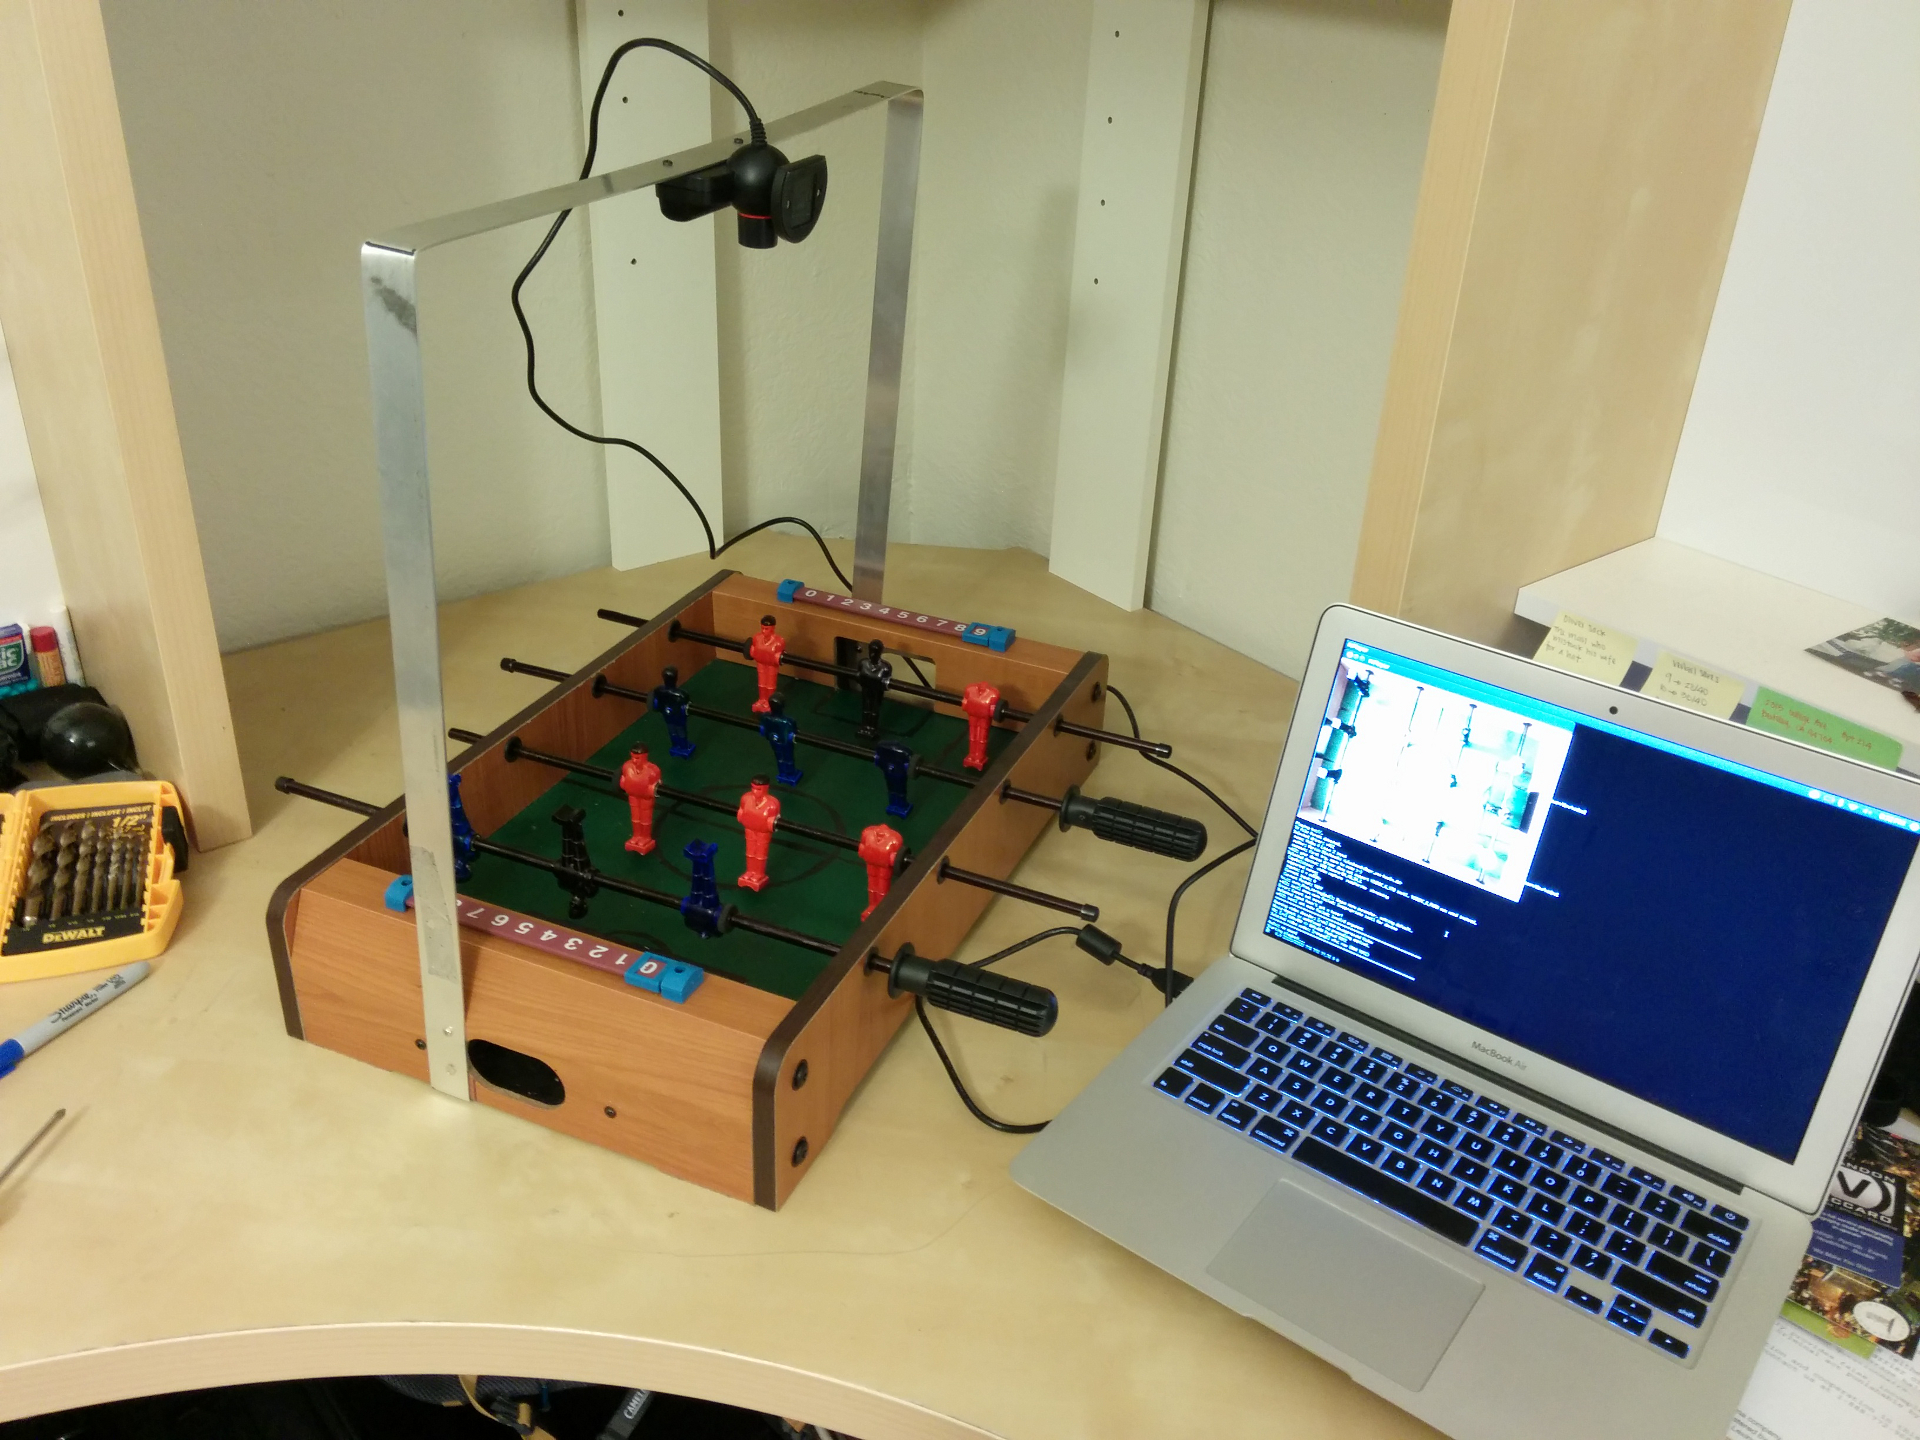
Eventually, I discovered that the speed of the camera and the RGB values of certain pixels differed dramatically as the lighting changed. My initial tracking algorithms would behave slightly differently at different times of the day, in different parts of the room, and so on. There was only so much I could do on the software side without diving into more advanced methods of image processing, which was something I was not interested in doing for this project. The easy solution was to provide static lighting for the camera so the framerate and pixels values remained constant. Two 120V 5W lightbulbs were duck-taped to the aluminum stands with gray construction paper used as shielding for my eyes.
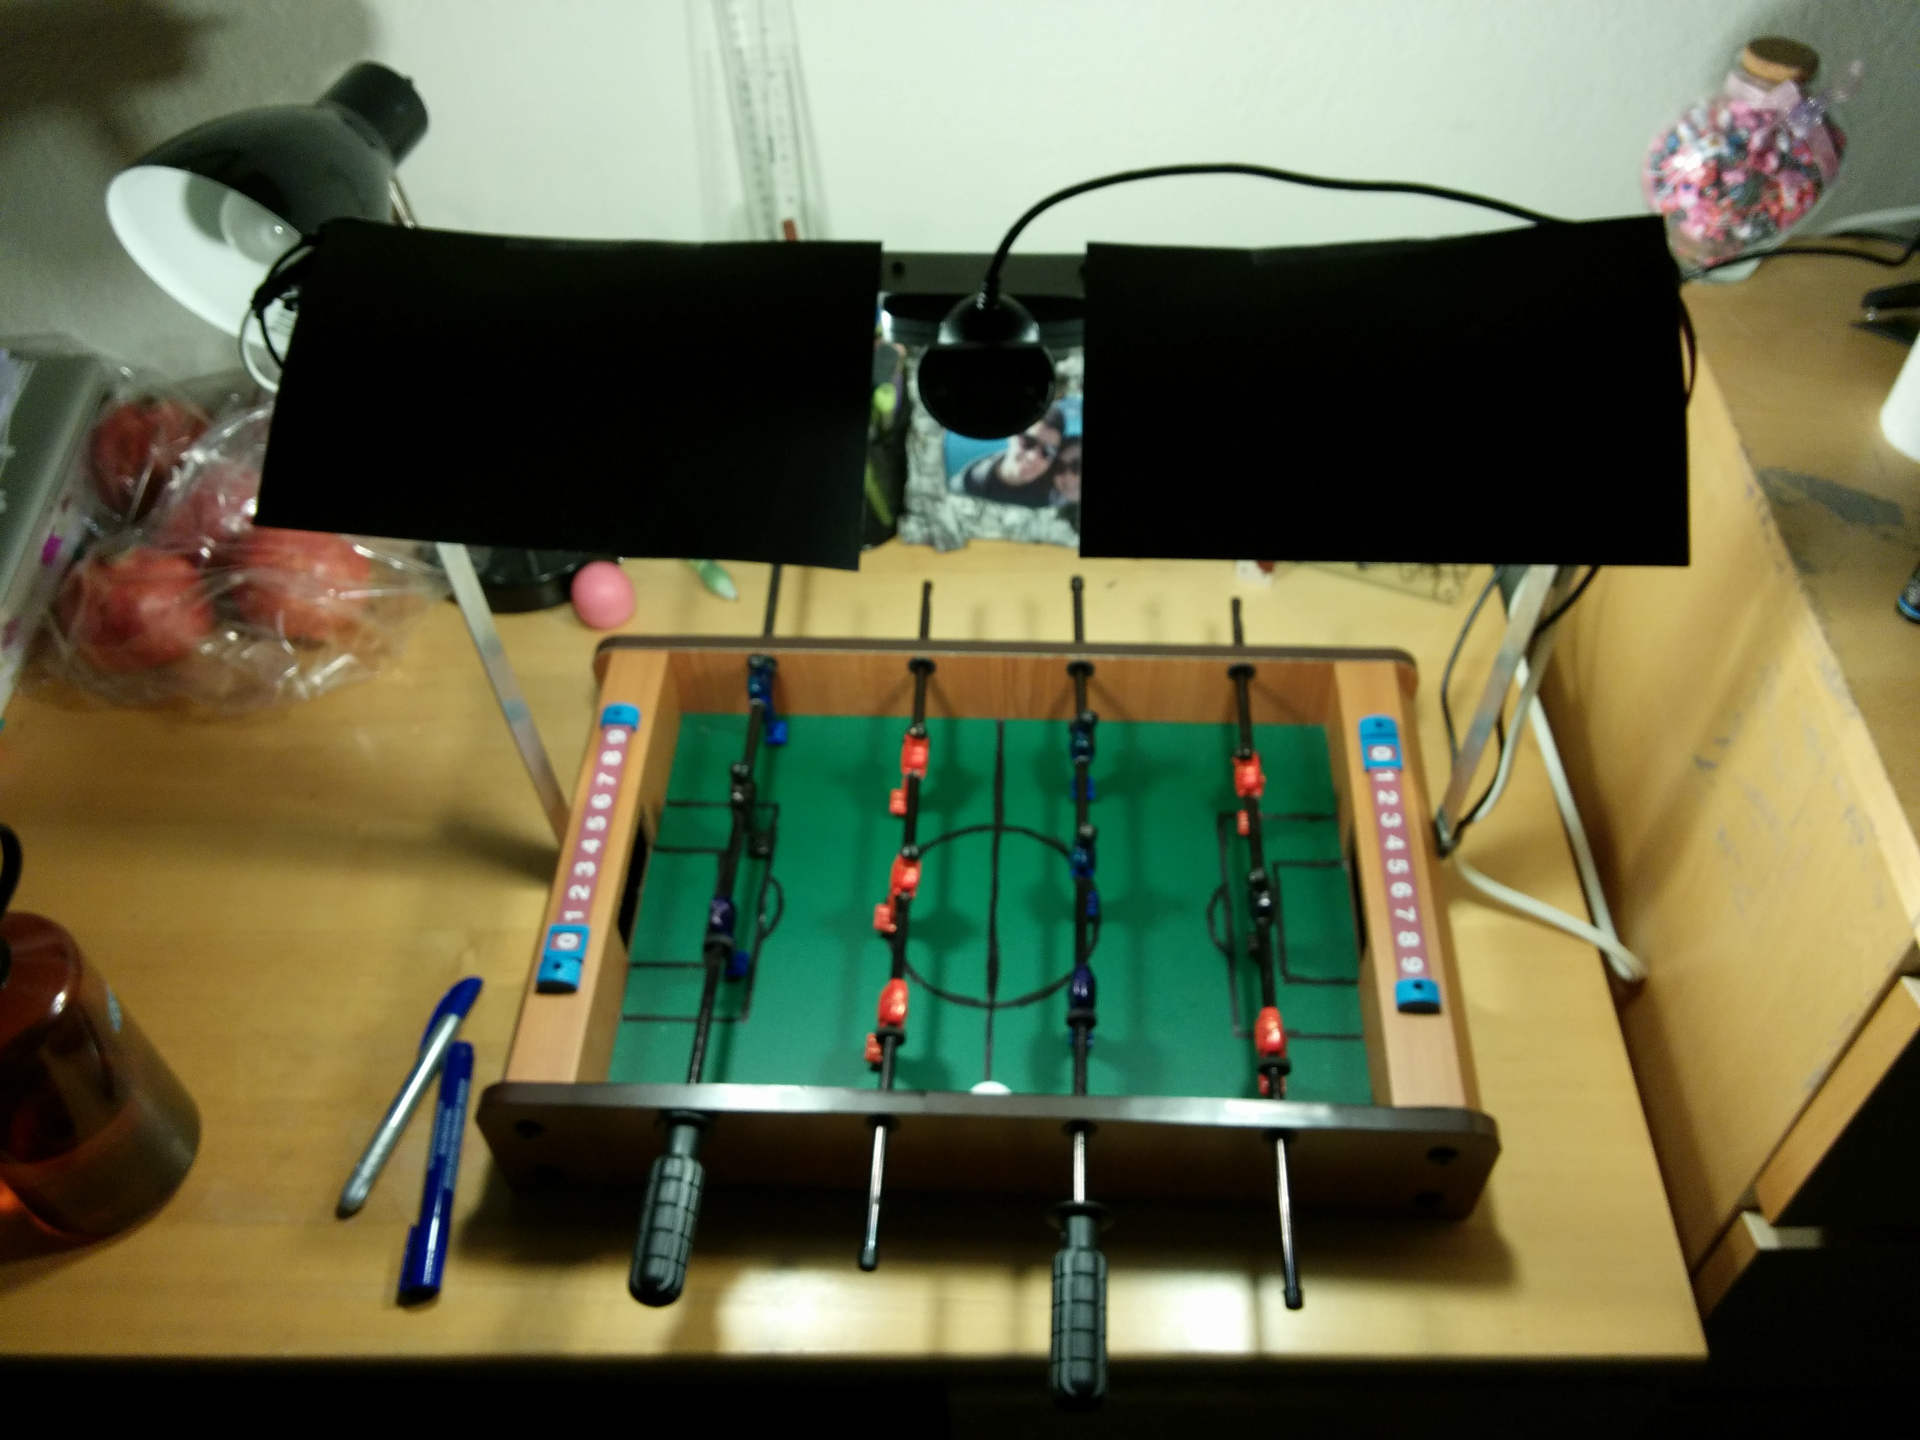
I cheated even more. If you compare the image above with the image of the original foosball table in the Amazon link, you will notice many differences. All the changes I made reduce noise my vision algorithm:
1. Sharpied the white lines black to reduce white pixels in frame
2. Painted the black-and-white soccer ball all white
3. Sharpied the metal handles black to reduce white pixels in frame
4. Sharpied the red-and-white players all red
5. Sharpied the yellow-and-blue players all blue
6. Sharpied goalies black to distinguish from outer players
7. Cut off heads of bottom players to eliminate black pixels near player-tracking areas
Model
The state of a foosball game can be modeled by a 2D grid with position data for the players and the balls. The ball is free to move anywhere on this grid so its position can be represented by an x,y coordinate. The players however are limited to one axis, on which they are free to rotate or slide (in my case the y-axis). Furthermore, the players are also fixed in number as well as relative distances between each other. This nature allows me to divide the gameState into static and dynamic properties. The static properties are the size of the 2D grid, the number of players per row, the distance between players for each row, and finally the x-coordinates for each row. The size of gameState was set to 320x240 (same as the output of the webcam) and the other static properties were determined manually afterwards. The dynamic properties are essentially the x,y-coordinates of the ball, the y-coordinates of one player (in my case the bottom player) for each row, as well the the player angle for each row. (Note: My model is missing a list of controllable rows). I further discretized the PlayerAngle into an enum with 5 possible states (see below). The horizontal angles allow the ball to pass underneath whereas the others do not. Lastly, the playerTheScored property is used to determine if the game is over and if so, who had scored, it remains null while the game is live.
public class GameState {

	//Static State Variables
	// The number of discrete points in the x-axis, perpendicular to the players
	private final int xLength;

	// The number of discrete points in the y-axis, parallel to the players
	private final int yLength;

	// A Map of the number of the players each row of players has
	private final Map<Integer, Integer> rowToPlayerCountMap;

	// A Map of the distance between players for each row
	private final Map<Integer, Integer> rowToPlayerDistanceMap;

	// A Map of the fixed x-position of the players for each row
	private final Map<Integer, Integer> rowToXPositionMap;

	//Dynamic State Variables
	private volatile int prevBallXPosition;
	private volatile int prevBallYPosition;
	private volatile int ballXPosition;
	private volatile int ballYPosition;
	private ConcurrentMap<Integer, Integer> rowToYPositionMap;
	private ConcurrentMap<Integer, PlayerAngle> rowToAngleMap;

	private volatile Player playerThatScored = null;
}

public enum PlayerAngle {

	FORWARD_HORIZONTAL, FORWARD_ANGLED, VERTICAL, BACKWARD_ANGLED, BACKWARD_HORIZONTAL;

}

public enum Player {

    SELF, ENEMY;
}
I need to preface the tracking algorithms with a quick explanation of the PotenialPositionRectangle object. It essentially represents a rectangle but spawns from a single point (it becomes the 2x2 rectangle around its original point). It has methods for determining whether another point is a member of the rectangle (within its bounds) or nearby (within a given distance). Furthermore, it has methods for adding new points, which will expand its own bounds to engulf the new point. Lastly, all the methods above can also be performed with another PotenialPositionRectangle; you can determine whether the two rectangles overlap, are within a certain distance from each other, and merge one into the other.
public class PotentialPositionRectangle {
    private int xStart;
    private int xEnd;
    private int yStart;
    private int yEnd;

    public PotentialPositionRectangle(int x, int y) {
        xStart = x - 1;
        xEnd = x + 1;
        yStart = y - 1;
        yEnd = y + 1;
    }

    public boolean isMember(int x, int y) {
        return x >= xStart && y >= yStart && x <= xEnd && y <= yEnd;
    }

    public boolean isWithin(int x, int y, int within) {
        return x >= xStart - within && y >= yStart - within && x <= xEnd + within && y <= yEnd + within;
    }

    public boolean doesCollide(PotentialPositionRectangle rect) {
        return this.isPotentialMember(rect.getxStart(), rect.getyStart())
                || this.isPotentialMember(rect.getxStart(), rect.getyEnd())
                || this.isPotentialMember(rect.getxEnd(), rect.getyStart())
                || this.isPotentialMember(rect.getxEnd(), rect.getyEnd());
    }

    public boolean isWithin(PotentialPositionRectangle rect, int within) {
        return this.isPotentialMember(rect.getxStart() - within, rect.getyStart() - within)
                || this.isPotentialMember(rect.getxStart() - within, rect.getyEnd() + within)
                || this.isPotentialMember(rect.getxEnd() + within, rect.getyStart() - within)
                || this.isPotentialMember(rect.getxEnd() + within, rect.getyEnd() + within);
    }

    public void addRectangle(PotentialPositionRectangle rect) {
        this.addMember(rect.getxStart(), rect.getyStart());
        this.addMember(rect.getxStart(), rect.getyEnd());
        this.addMember(rect.getxEnd(), rect.getyStart());
        this.addMember(rect.getxEnd(), rect.getyEnd());
    }

    public void addMember(int x, int y) {
        if (x <= xStart) {
            xStart = x - 1;
        }
        if (y <= yStart) {
            yStart = y - 1;
        }
        if (x >= xEnd) {
            xEnd = x + 1;
        }
        if (y >= yEnd) {
            yEnd = y + 1;
        }
    }

}
Player Tracking
Below you will see a glimpse of the game state visualization (sorry for the horrible picture). Notice the four white rectangles that span across every row? Those rectangles are drawn using the GameState field rowToXPositionMap (the x position from the map is the center of the rectangles that are 10 pixels wide). The player tracking algorithm limits itself to the x-bounds of that rectangle. Starting from y/2 (remember I only need to find the y-position and PlayerAngle of the bottom player), I start looking for blue-like or red-like pixels, depending on the row, until I reach the bottom of image. If I find a pixel matching my color thresholds, I iterate over a list of PotentialPositionRectangles and add them to the rectangles that I am with N pixels of. You can play with N, mine is 0. If I find myself without any memberships, I create a new PotentialPositionRectangle with the current point and add it to the list, but if i find myself with more than one membership then the PotentialPositionRectangles that I am a member of might overlap so I merge the ones that do and remove the extras from the list. What this results in is a list rectangles that encapsulate my pixels, it’s not quite the contiguous pixels of my choice, but it’s similar. Next, I iterate over this list and remove any rectangles that are less than 15pixels in height, I call these “noisy rectangles”. Usually this only leaves one remaining rectangle, but in the case there’s multiple I pick the one closest to the current y-position of that player. If you look closely at the picture below, you will see red or blue rectangles around the bottom players with some “noisy rectangles” above or below.
Player angles are then determined from y-positions we just found. Notice the red and blue rectangles to the left and right of players in the image below. Those are the thresholds for when a player is in a forward or backward type position. I scan the pixels in those boxes and if I find more than M pixels in the box then we know we’re in a non-vertical position (M is set to 25 in my case). From here, we scan pixels in another box of the same size immediately adjacent to drawn boxes to determine if we are in a horizontal position or not.
![]()
Ball Tracking
My first pass at the ball tracking algorithm was to use the average position of all the white-like pixels. After that failed miserably, I came up with the algorithm I explained above. After looping over the entire image, I had my list of PotentialPositionRectangles (of white pixels) with many different candidates. I then loop over the PotentialPositionRectangles and scored them based on their distance away from being a perfect 22x22 square. The lowest score became the ball’s new position. This worked fairly well except occasionally a noisy PotentialPositionRectangle would score well causing the ball to jump to the other side of the table then jump back. I solved this by including the distance from the previous ball position in the score. It’s still not perfect but works fairly well.
for (PotentialPositionRectangle rect : potentialBallPositionRectangles) {
    double score = Math.sqrt(Math.pow(22 - rect.getXLen(), 2)
                    + Math.pow(22 - rect.getYLen(), 2))
                    + (Math.sqrt(Math.pow(gameState.getBallXPosition() - xPosition, 2)
                    + Math.pow(gameState.getBallYPosition() - yPosition, 2))) / 3;
    .
    .
    .
}
Optimizations
The basic loop in the gameStateUpdater originally did the following:
while (!isShutdown) {
    BufferedImage img = stateReader.readState();

    // Update Players positions in current thread (~10ms)
    this.updatePlayerPositions(img);

    // Update Ball Position in current thread (~40-50ms)
    this.updateBallPosition(img);

    notifyListeners();
}
The whole thing took on average 55ms which made visualization seem a bit slow. I decided to multi-thread the the ball position calculation by splitting it up into 5 regions where the divider was the player bar. Each region would calculate its own lowest scoring PotentialPositionRectangle and in the end it picks the best of the 5. This is possible because the ball can’t be seen when its directly under the bar and the original algorithm would have chosen the side where the ball was sticking out the most anyway, so there’s little difference between the results of the two. The new code calculates the player and ball position within ~15ms and the visualization is much more fluid.
while (!isShutdown) {
    BufferedImage img = stateReader.readState();

    // Start Calculating Ball Positions
    List<Future<PotentialPositionRectangle>> potentialBallPositions = this.startCalculatingBallPositionsAsync(img);

    // Update Player positions in current thread
    this.updatePlayerPositions(img);

    // Wait for futures and update ball position
    this.updateBallPosition(potentialBallPositions);

    notifyListeners();
}
Demo
comments powered by Disqus