Robot Foosball Part 2: Mechanics and Hardware
Introduction
I need to warn you that I have a very limited set of tools at my disposal. Namely, a drill, a hand saw, pliers, and screw drivers. One day I will build CAD models of my designs and machine them to perfection, but for now, I need to improvise so don’t judge my handy-work!
Parts
I already had an Arduino Uno from a different project, so to save money, I decided to reuse it for this one. The big decision now was selecting the right servos to control the players. The most important factor for me was speed. After browsing through all the servos at servo city, I selected a few based on their speed and price. To my disappointment I had discovered that many servos (especially the fast ones) were limited to 90 degrees of rotation as opposed to 180. Servo city charges $10 to reprogram the servos for 180 degree rotation, or I can buy a programmer myself. Among the three available programmers priced at $25, $50, and $70, I would only be able to use the latter one because the cheaper ones must be connected to a computer running software that’s only available for Windows. Fortunately, I soon discovered that the rotation limits were only applicable to the digital servos so I selected the Hitec HS-225MG, an analog servo capable of rotating 60 degrees in 110ms and priced at $25. I followed up that purchase with more aluminum from the hardware store and began the fun!
Setup
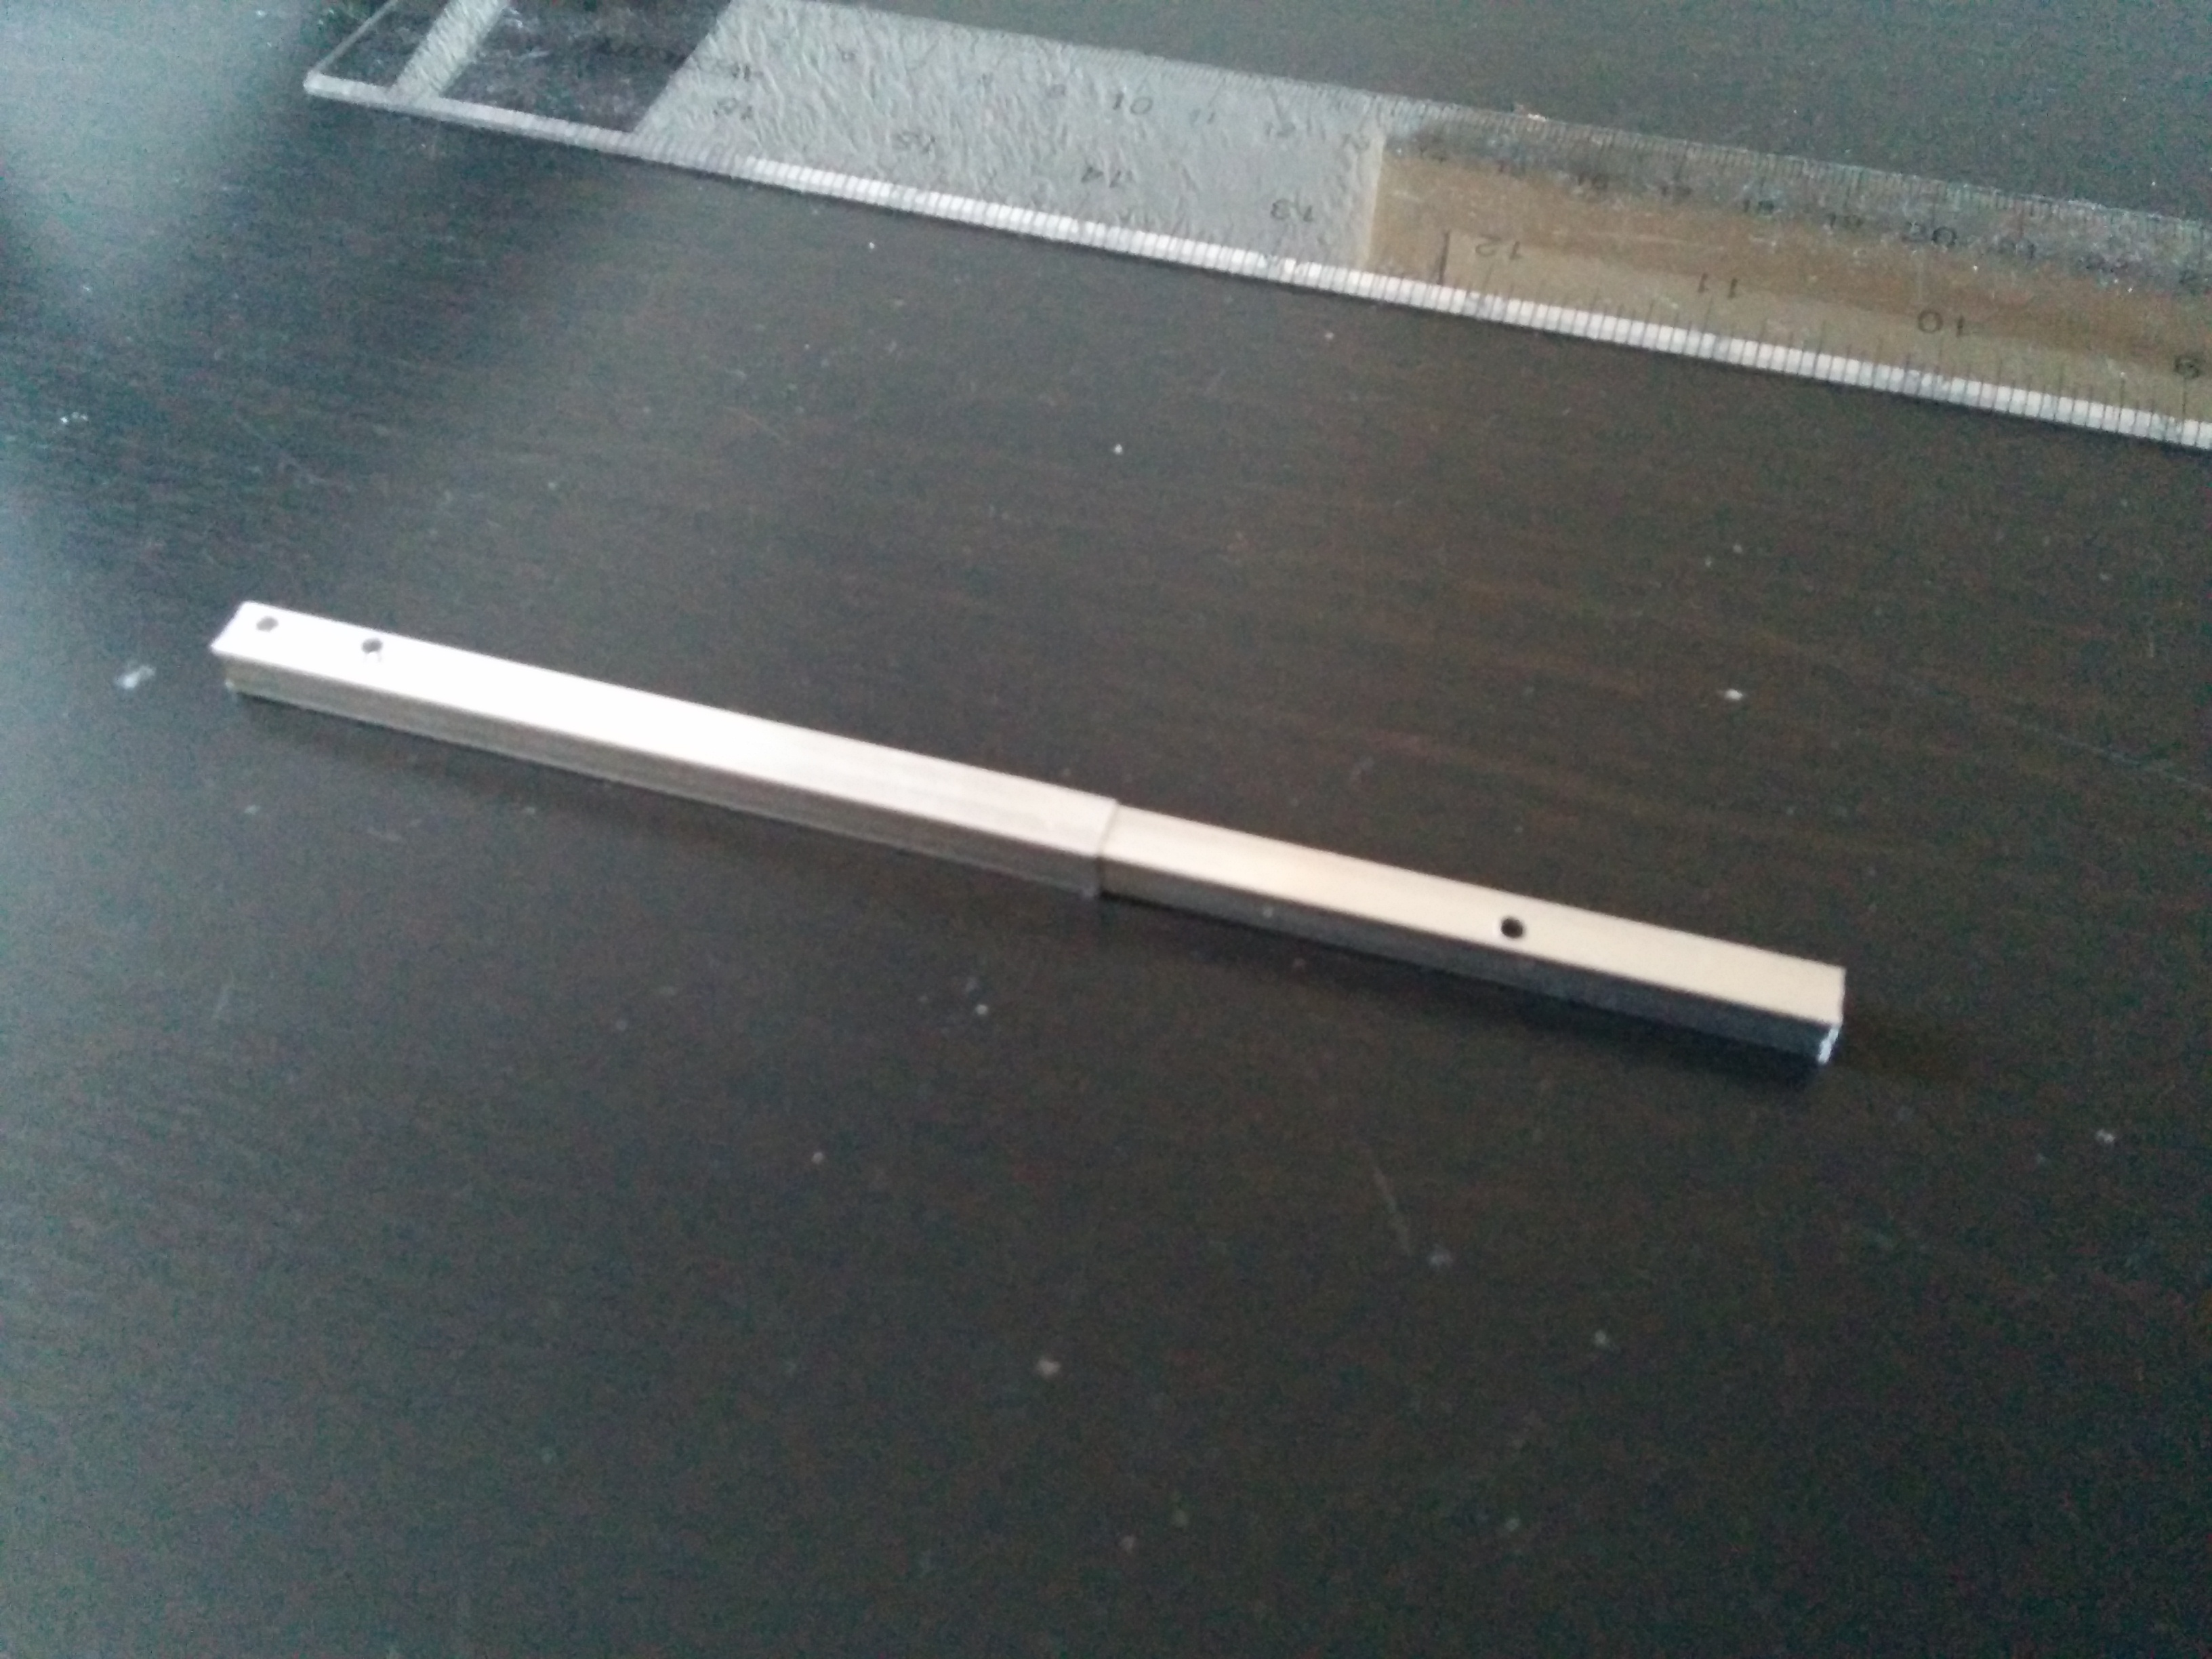
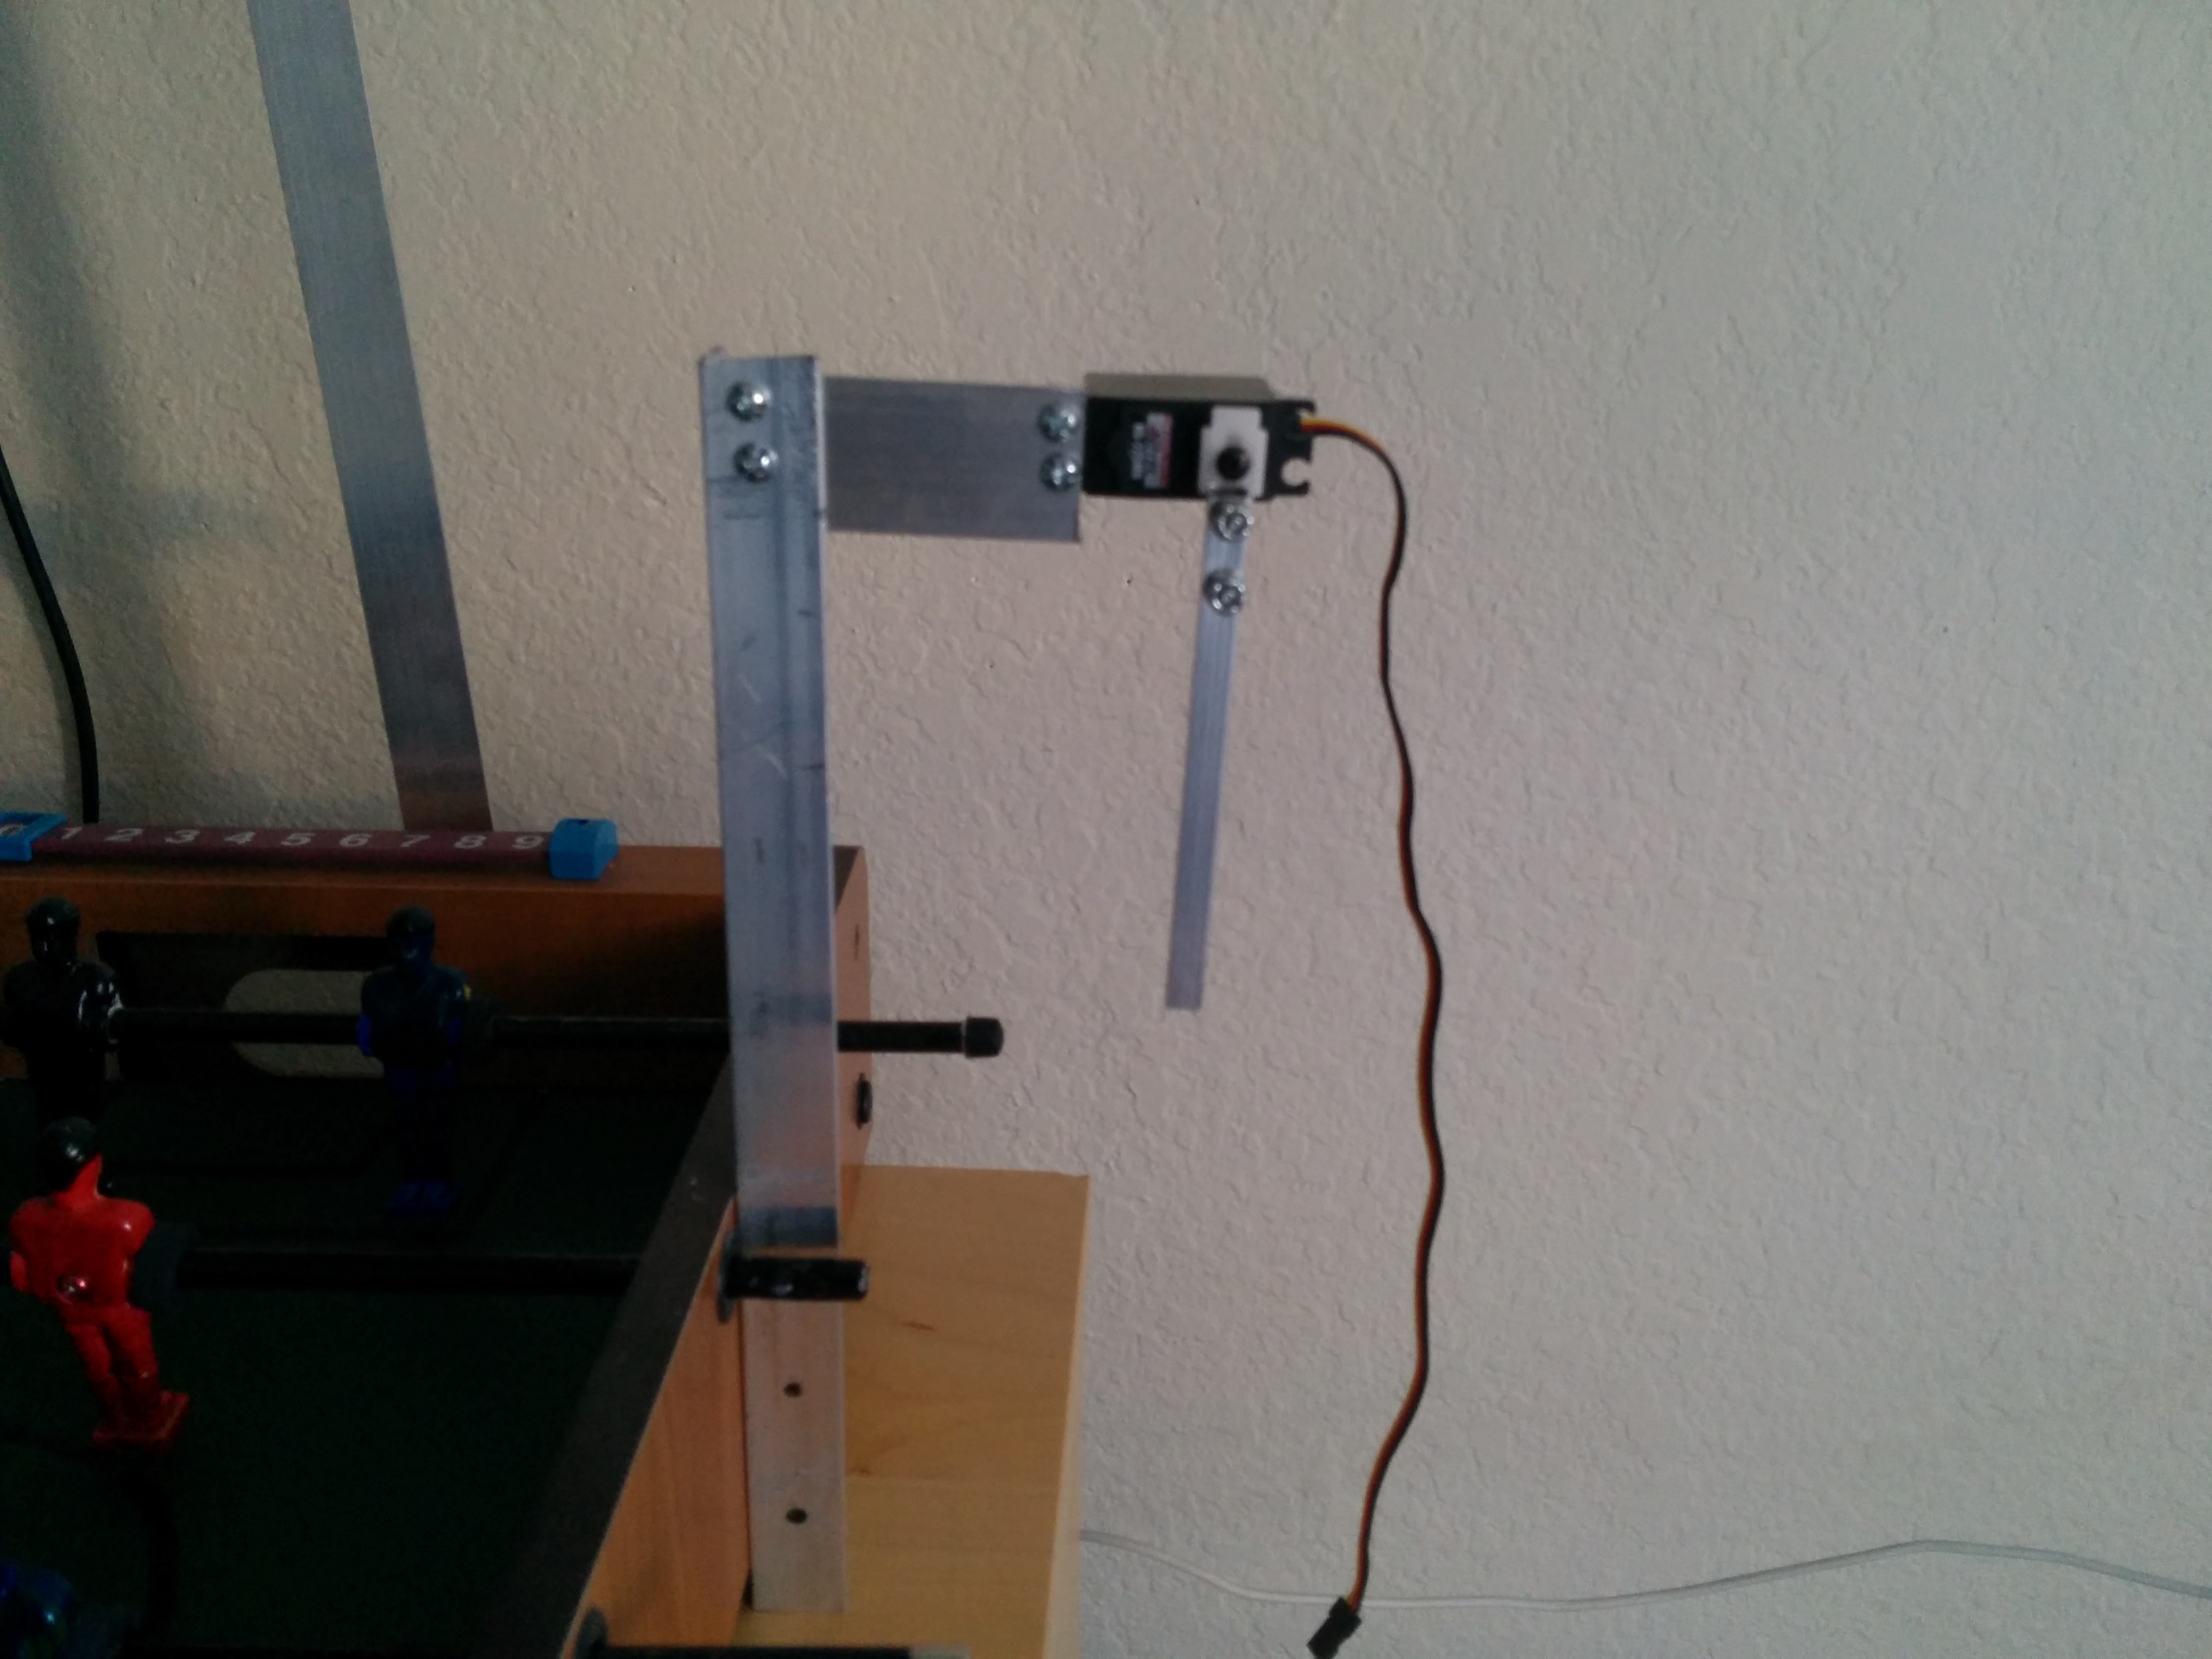
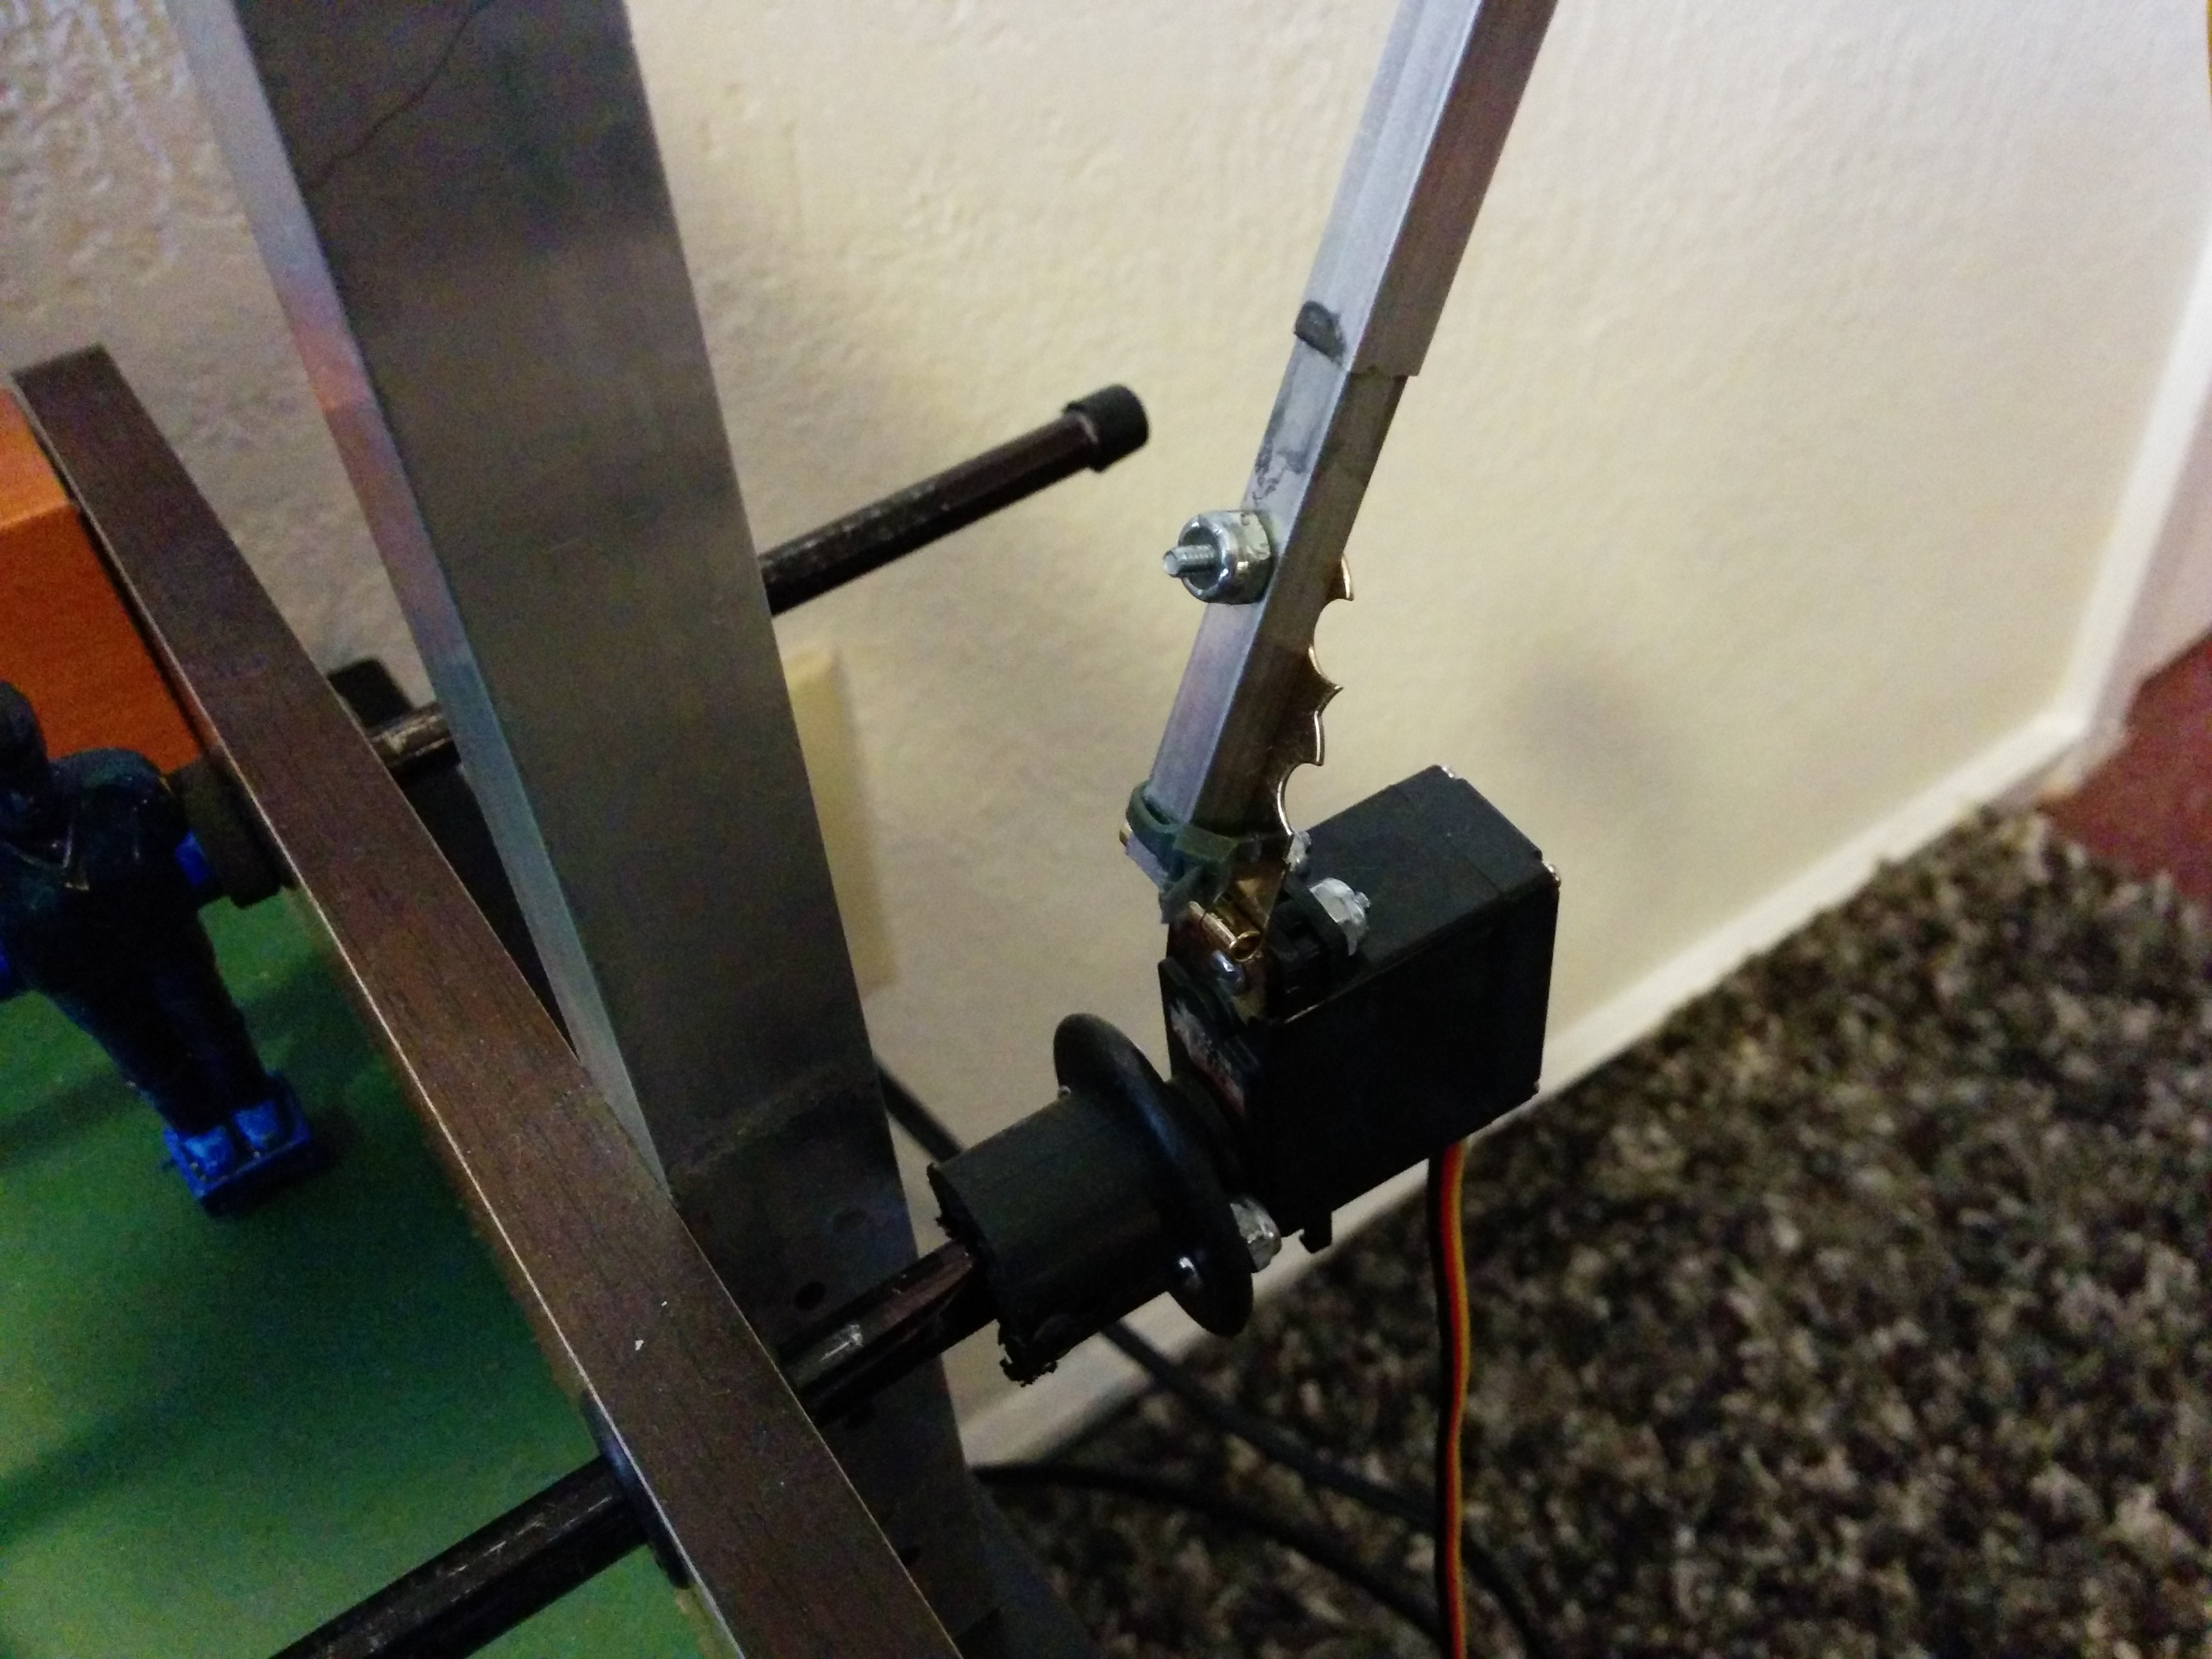
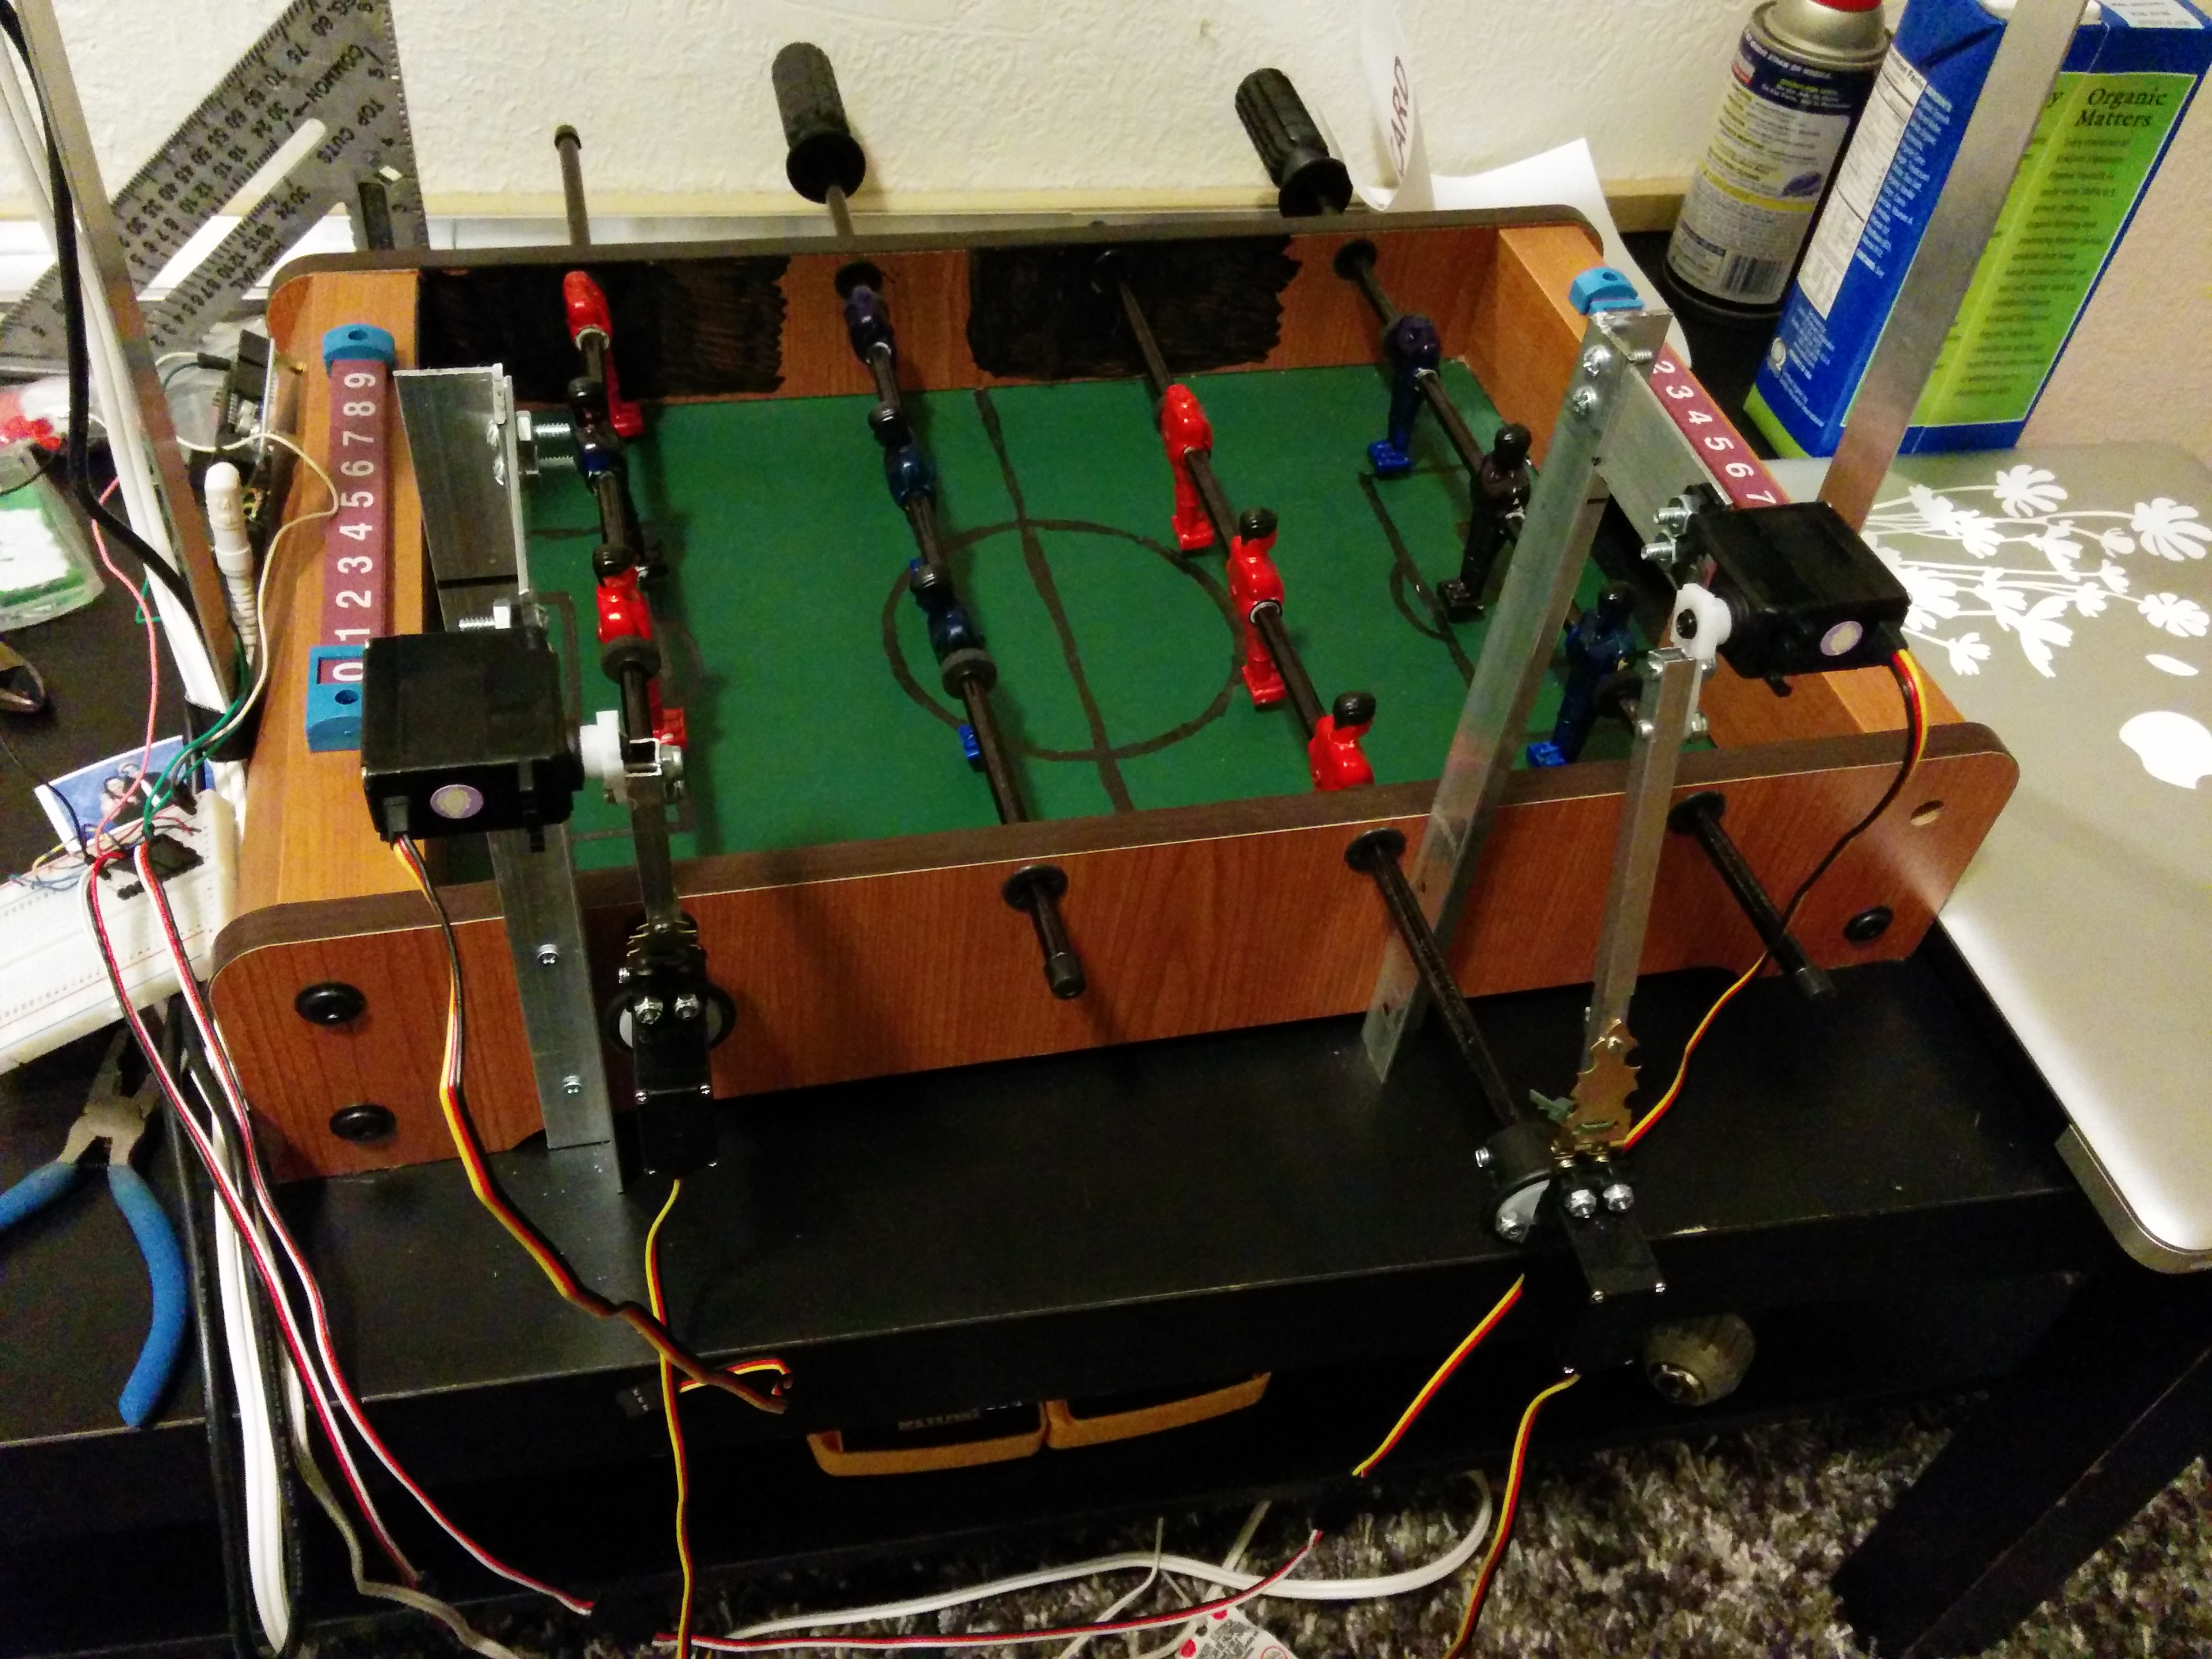
To control the players’ positional movement, I initially thought I’d use a some sort of rack and pinion to transform the servo’s rotational movement to linear movement. After some research, the prices ($50+ each) seemed too high for the size I needed. With some brainstorming, I realized I could accomplish the same thing by simply having an arm extend from the positional servo and attach to the angular servo with a hinge. However, that arm needs to somehow be able to freely change length while remaining rigid in the plane of movement. I drove to the hardware store to see what I could find. I was fortunate enough to find some square aluminum tubing where one size fits perfectly inside another. I cut the tubes to length, drilled the holes for mounting, attached an aluminum L-bracket to the side of foosball table and secured the first servo with its arm.
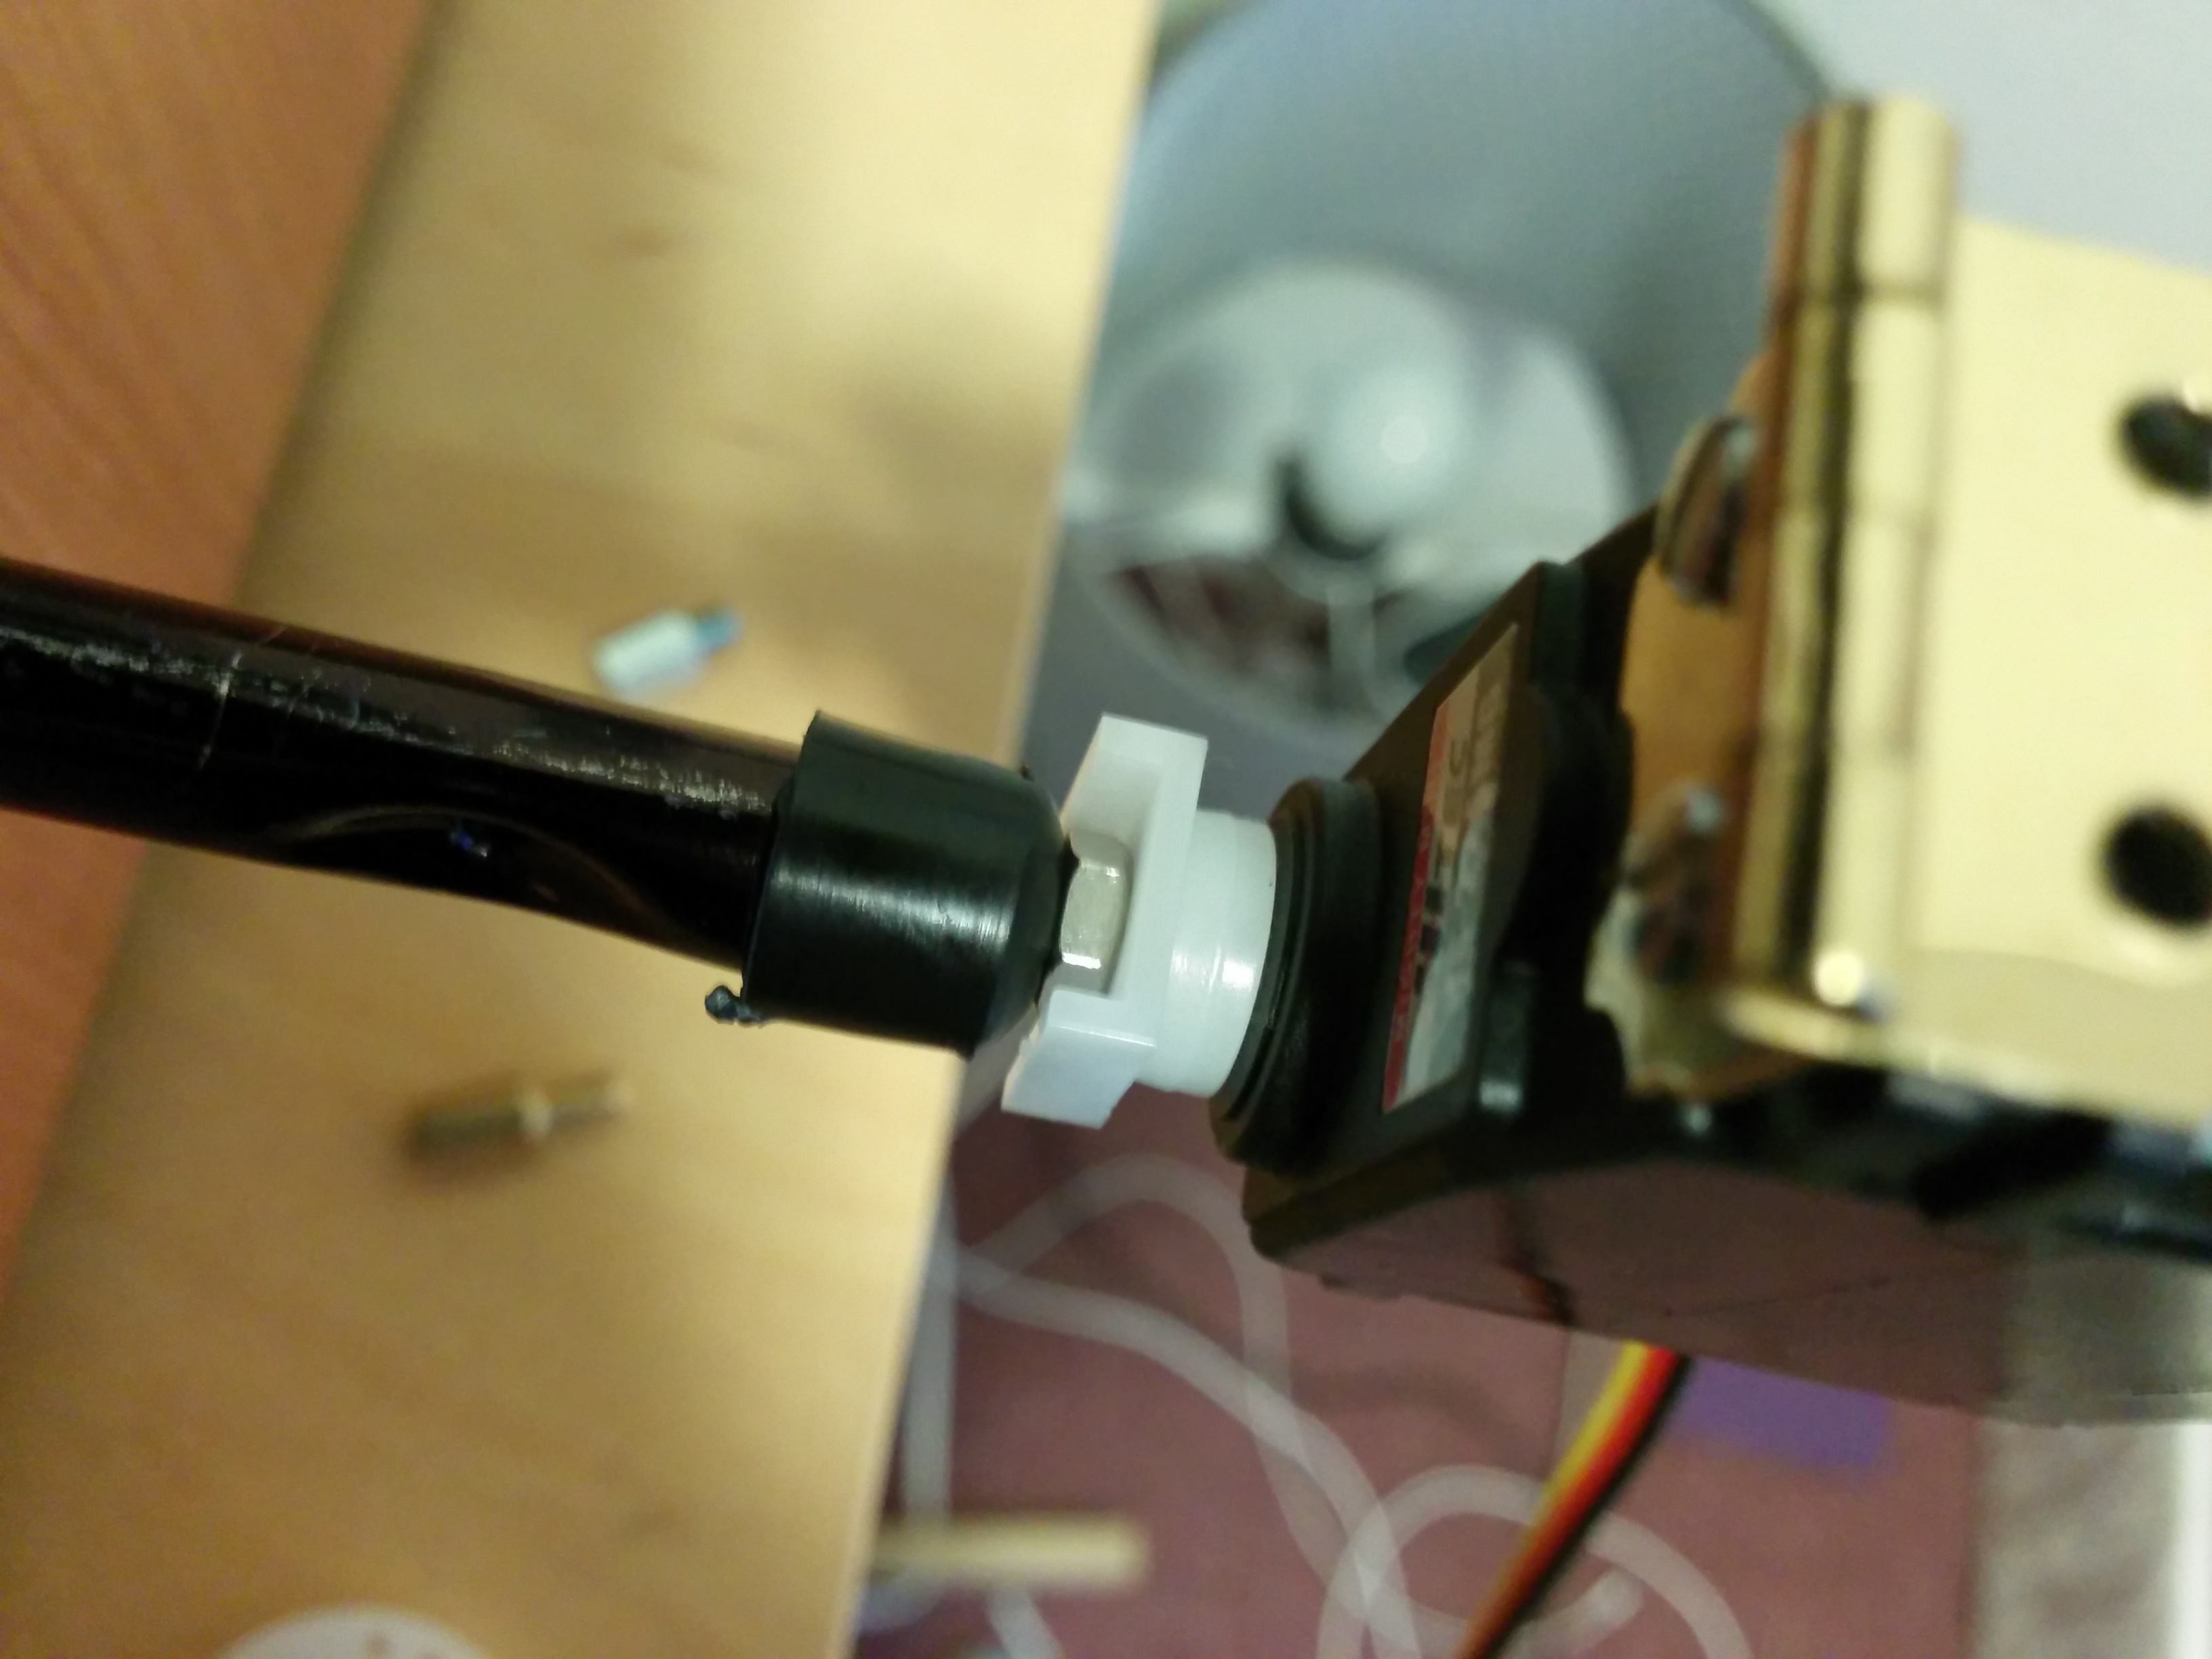
For the angular servo I mounted a small brass hinge onto the servo then I used a single bolt and zip tie to secure the other square tube onto the hinge. Next, I experimented with different ways of attaching the servo to the player rod. First, I tried drilling a hole into the plastic end cap that came with the foosball table. Then attached the end cap onto the servo as I would a regular servo arm. The end cap was secured to the rod with duck tape but that is not shown in the image below.
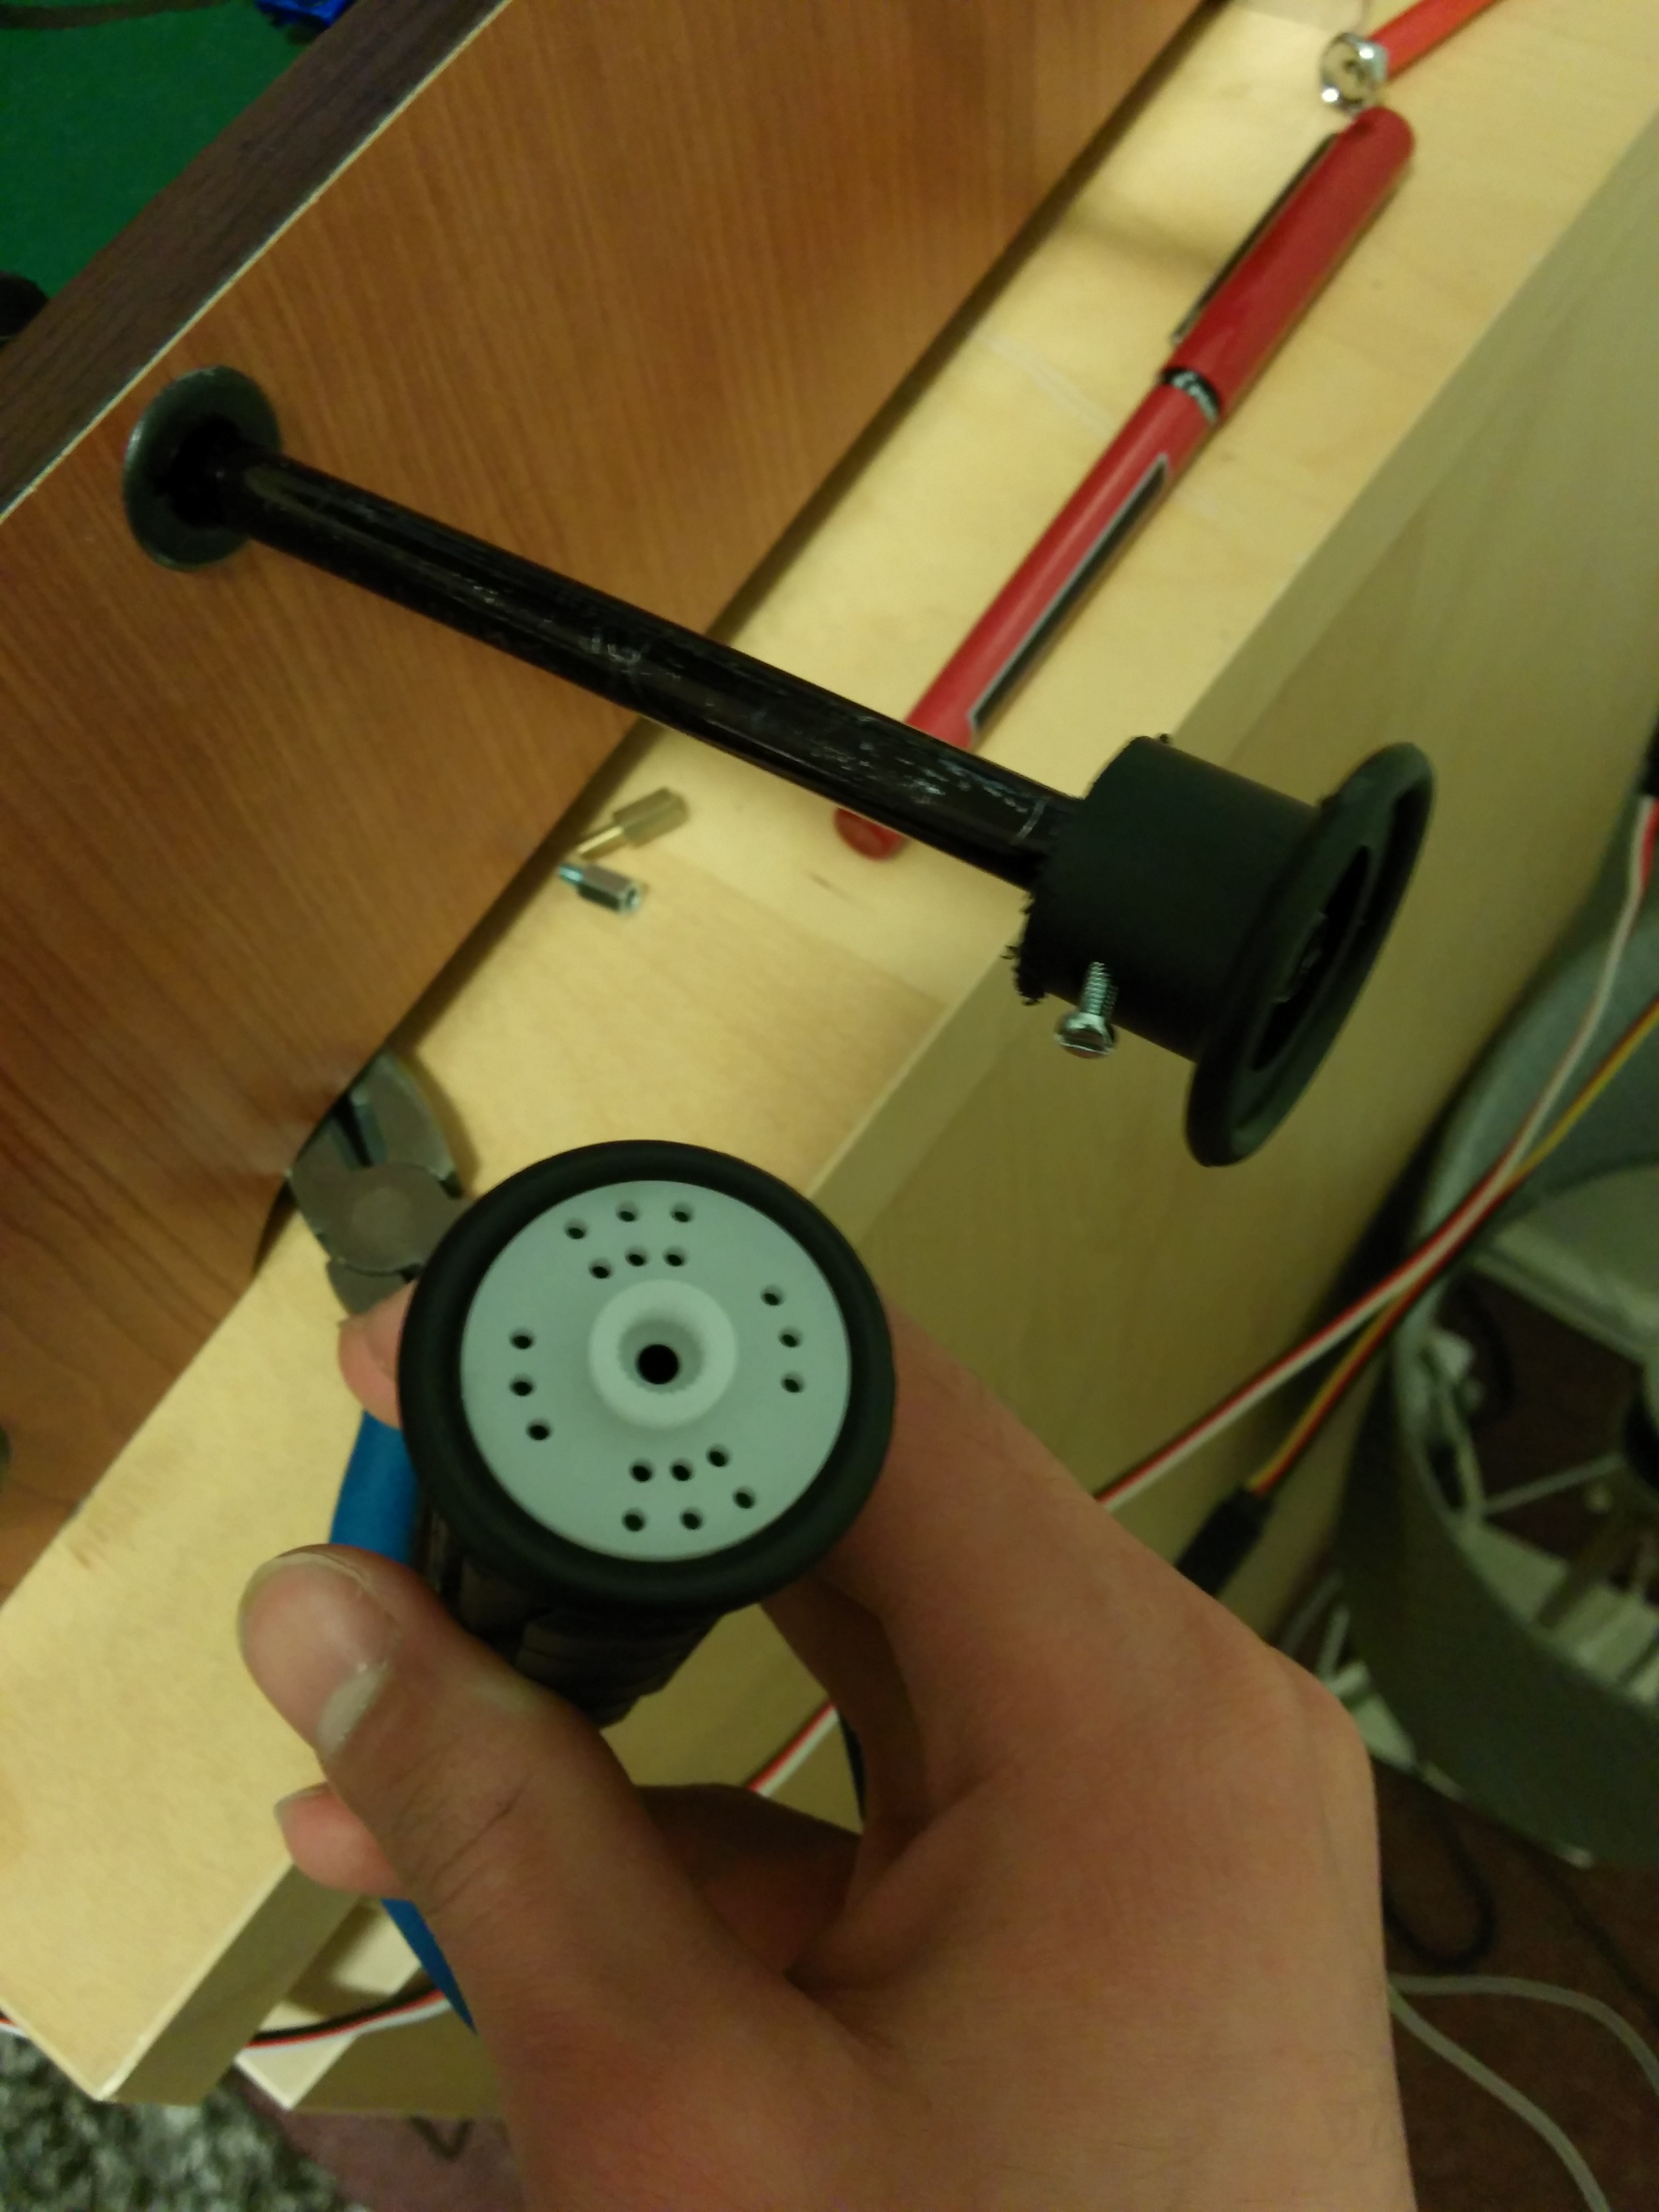
As excepted, this did not work too well. After a few hits the player angles shifted within the end cap and servo neutral was no longer player neutral. Luckily, further experimentation lead to an awesome discovery. The plastic handles that came with the foosball table had a perfectly sized crevice for the circular plastic servo arm. I dissected the plastic handle and mounted the servo to the rod with a screw.
It wasn’t long before I constructed the mount for the other player rod, attached the arduino onto the table, and connected all the servos to the bread board.
Control
The foosball agent is expected to send servo angle commands to the arduino in 4-byte packets where each byte maps to a particular servo. The arduino simply reads data from the serial port and sets the servo angles.
#include <Servo.h>

int rowZeroYPositionPin = 3;
int rowZeroAnglePin = 5;
int rowOneYPositionPin = 6;
int rowOneAnglePin = 9;

Servo rowZeroYPositionServo;
Servo rowZeroAngleServo;
Servo rowOneYPositionServo;
Servo rowOneAngleServo;

int bytesRead = 0;
int data = 0;

void setup(){
  //Serial
  Serial.begin(9600);

  //Attach Servos
  rowZeroYPositionServo.attach(rowZeroYPositionPin);
  rowZeroAngleServo.attach(rowZeroAnglePin);
  rowOneYPositionServo.attach(rowOneYPositionPin);
  rowOneAngleServo.attach(rowOneAnglePin);
  rowZeroYPositionServo.write(90);
  rowZeroAngleServo.write(90);
  rowOneYPositionServo.write(90);
  rowOneAngleServo.write(90);

  bytesRead = 0;
}

void loop() {
  	if (Serial.available() >= 1) {
      	data = Serial.read();
      	if(bytesRead == 0) {
        	rowZeroYPositionServo.write(data);
      	} else if(bytesRead == 1) {
        	rowZeroAngleServo.write(data);
      	} else if(bytesRead == 2) {
        	rowOneYPositionServo.write(data);
      	} else {
        	rowOneAngleServo.write(data);
      	}
      	bytesRead++;
      	if(bytesRead == 4) {
        	bytesRead = 0;
      	}
  	}

}
The angular servos are free to move 0 to 180 degrees, however you may realize the positional servos cannot have such freedom. They are in fact limited to about 45 degrees of motion. I manually determined the specific angles for the start and end points of the positional servos and added these offsets to the output of the java program so that the arduino would perform minimal computation. The java foosball agent has to determine an absolute position it wants the player to be in, but then it has to be converted to the proper servo angle. For instance, if the agent decides it wants the player in row 1 to be in position 0 then I have to eventually convert that to a servo angle. If the range of player positions is [0, 240] and the range of servo positions for row 1 is [65, 110], then I must output 65. These conversion are performed in the USBWriter class which wraps the RxTx Java Library (a library for serial I/O).
Demo
The following video will demonstrate how the servos control the players.
The MirrorAgent in the demo will match what the opposing player does.
public class MirrorAgent extends AbstractFoosballAgent {

    public void performAction() {
        if (gameState.getPlayerThatScored() == null) {
            List<Integer> intendedYPositions = new ArrayList<Integer>(2);
            List<PlayerAngle> intendedPlayerAngles = new ArrayList<PlayerAngle>(2);
            intendedPlayerAngles.add(gameState.getPlayerAngleForRow(0));
            intendedPlayerAngles.add(gameState.getPlayerAngleForRow(2));
            intendedYPositions.add(gameState.getRowYPosition(0));
            intendedYPositions.add(gameState.getRowYPosition(2));
            usbWriter.setPlayerPositions(intendedYPositions, intendedPlayerAngles);
        } else {
            this.resetRound();
        }
    }
}
comments powered by Disqus